Set up your first campaign
Choose channels, build a playbook, set approvals, and launch outreach from a reviewed Project.
Reviewed 2026-08-25
A Campaign contacts people from a completed Project. You choose the sending channels, tell Lumnis how to communicate, and decide which actions need your approval. Nothing starts until you choose Create & Start on the final step.
Before you start
You need:
- A completed Project with people you want to contact.
- A connected LinkedIn account, a ready email inbox, or both.
- A clear outcome, such as starting qualified conversations or booking meetings.
Open the Project and choose View Prospects. Review the list and CRM context, then choose Create Campaign for the people you want to include.
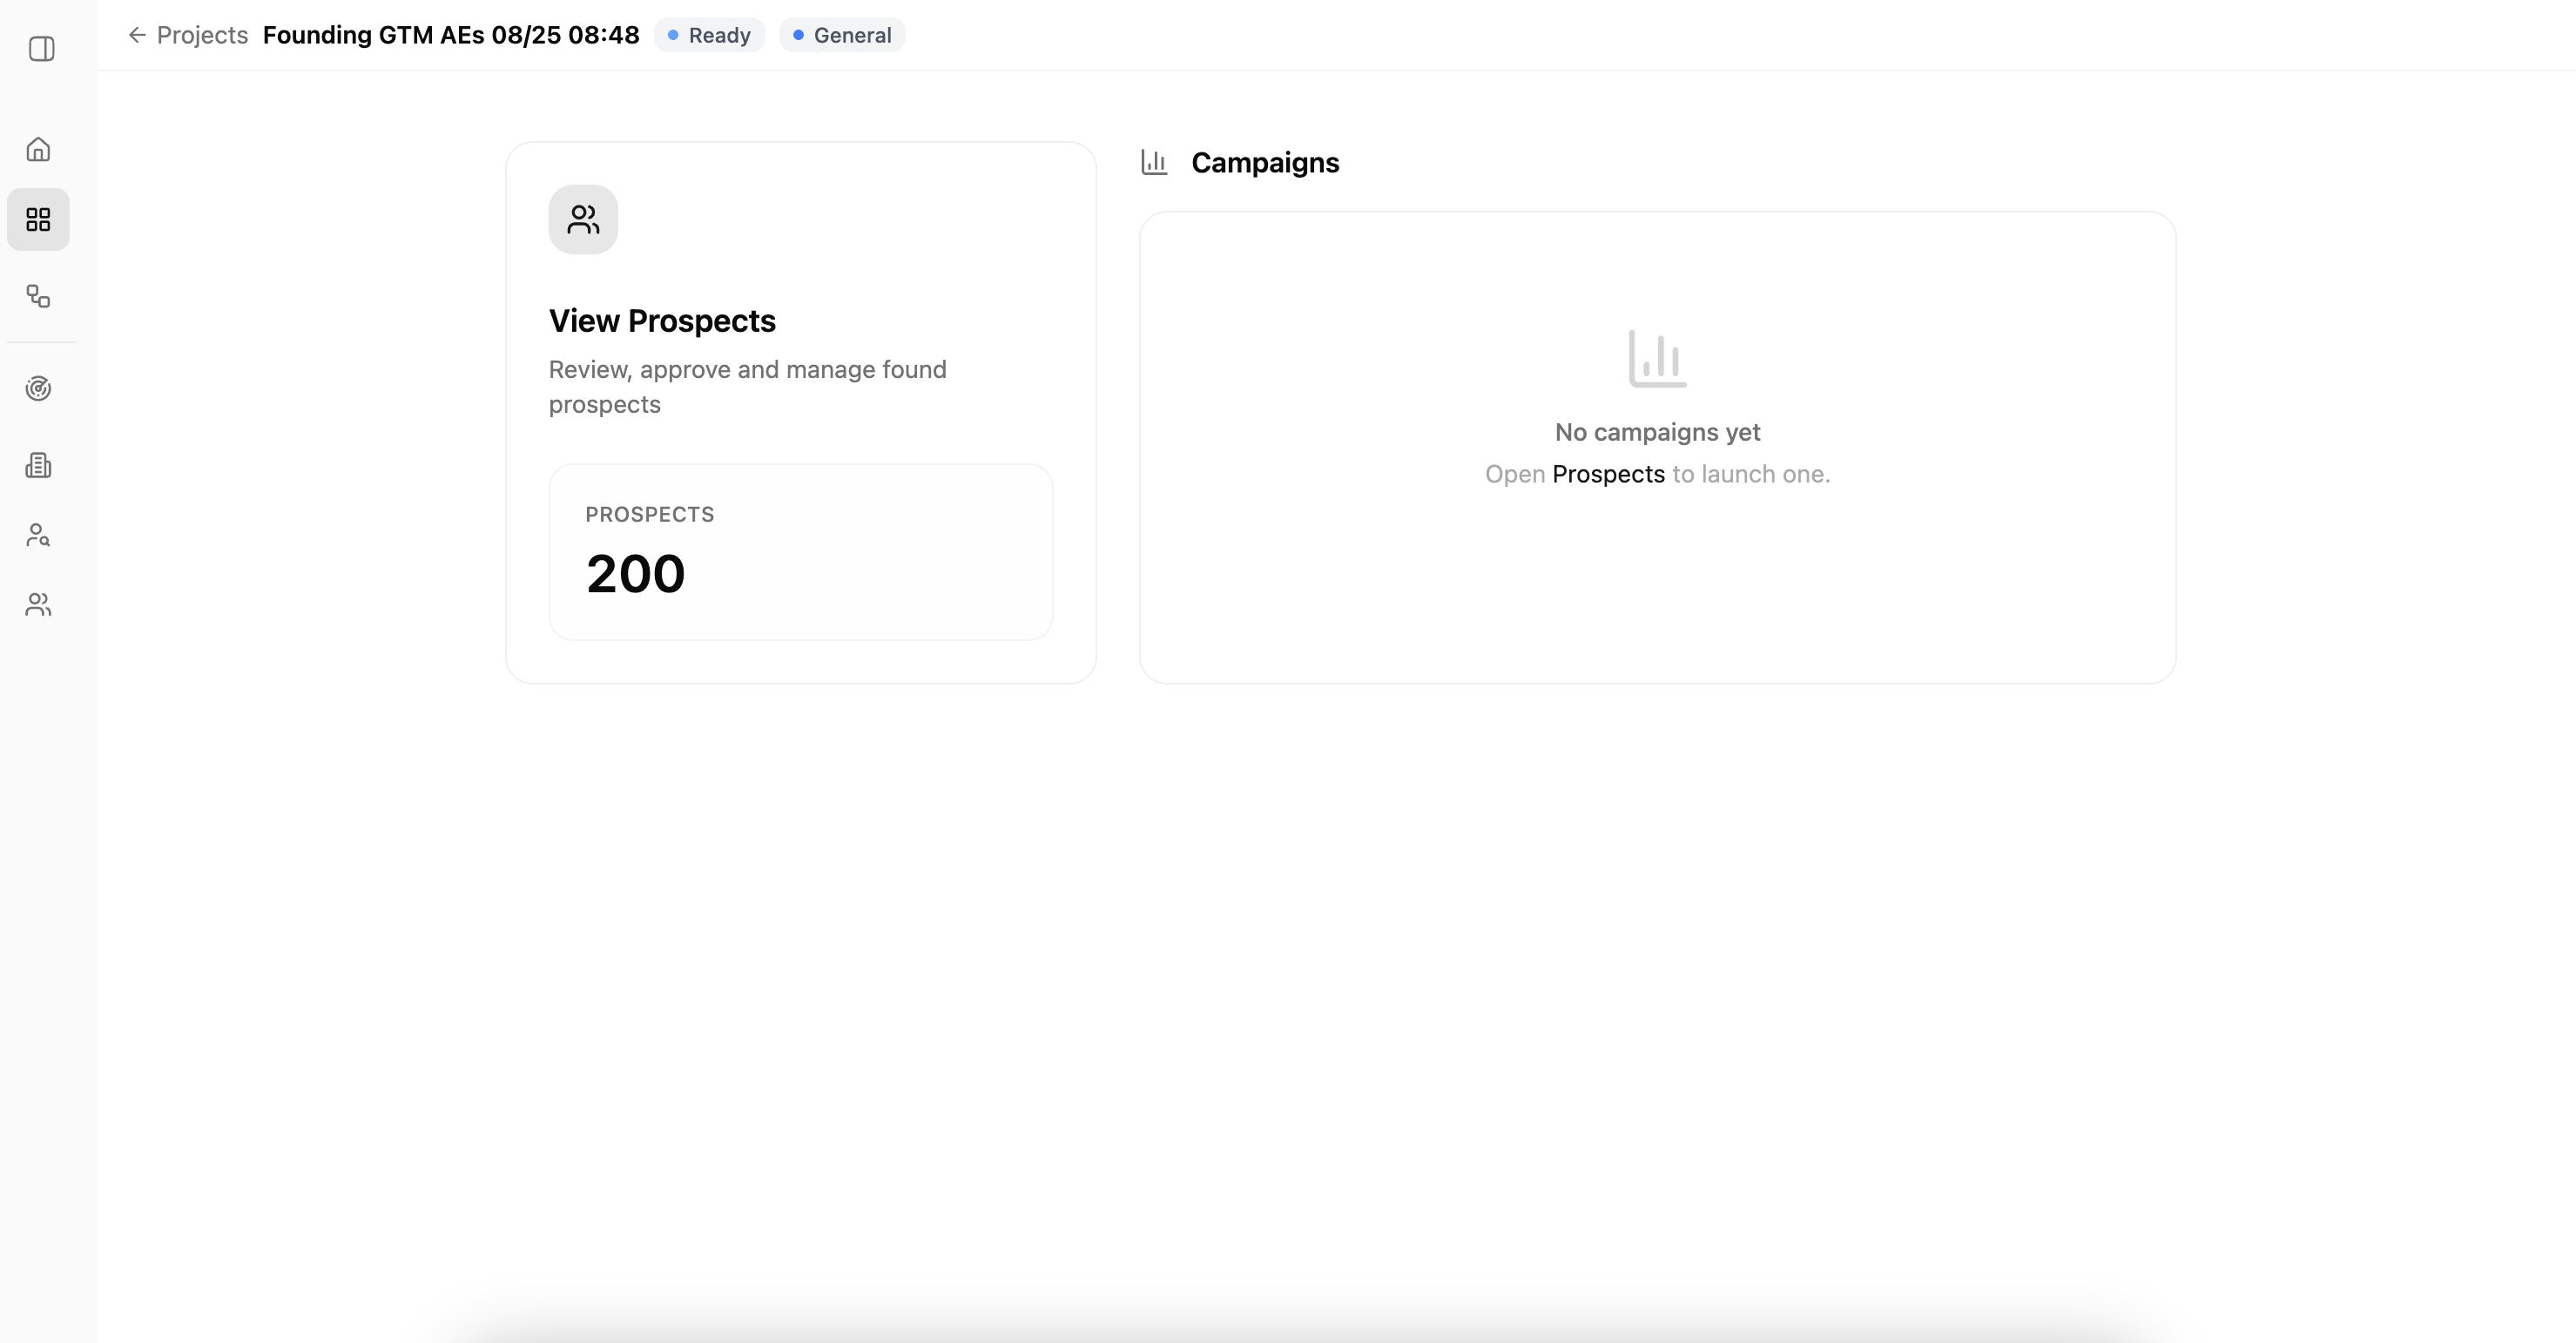
1. Choose channels and a sender
Choose LinkedIn + Email, LinkedIn only, or Email only. Confirm who will send the campaign. A channel marked Ready can be used now; otherwise, connect the required account before continuing.
If a teammate will send the campaign, they must connect their own account.
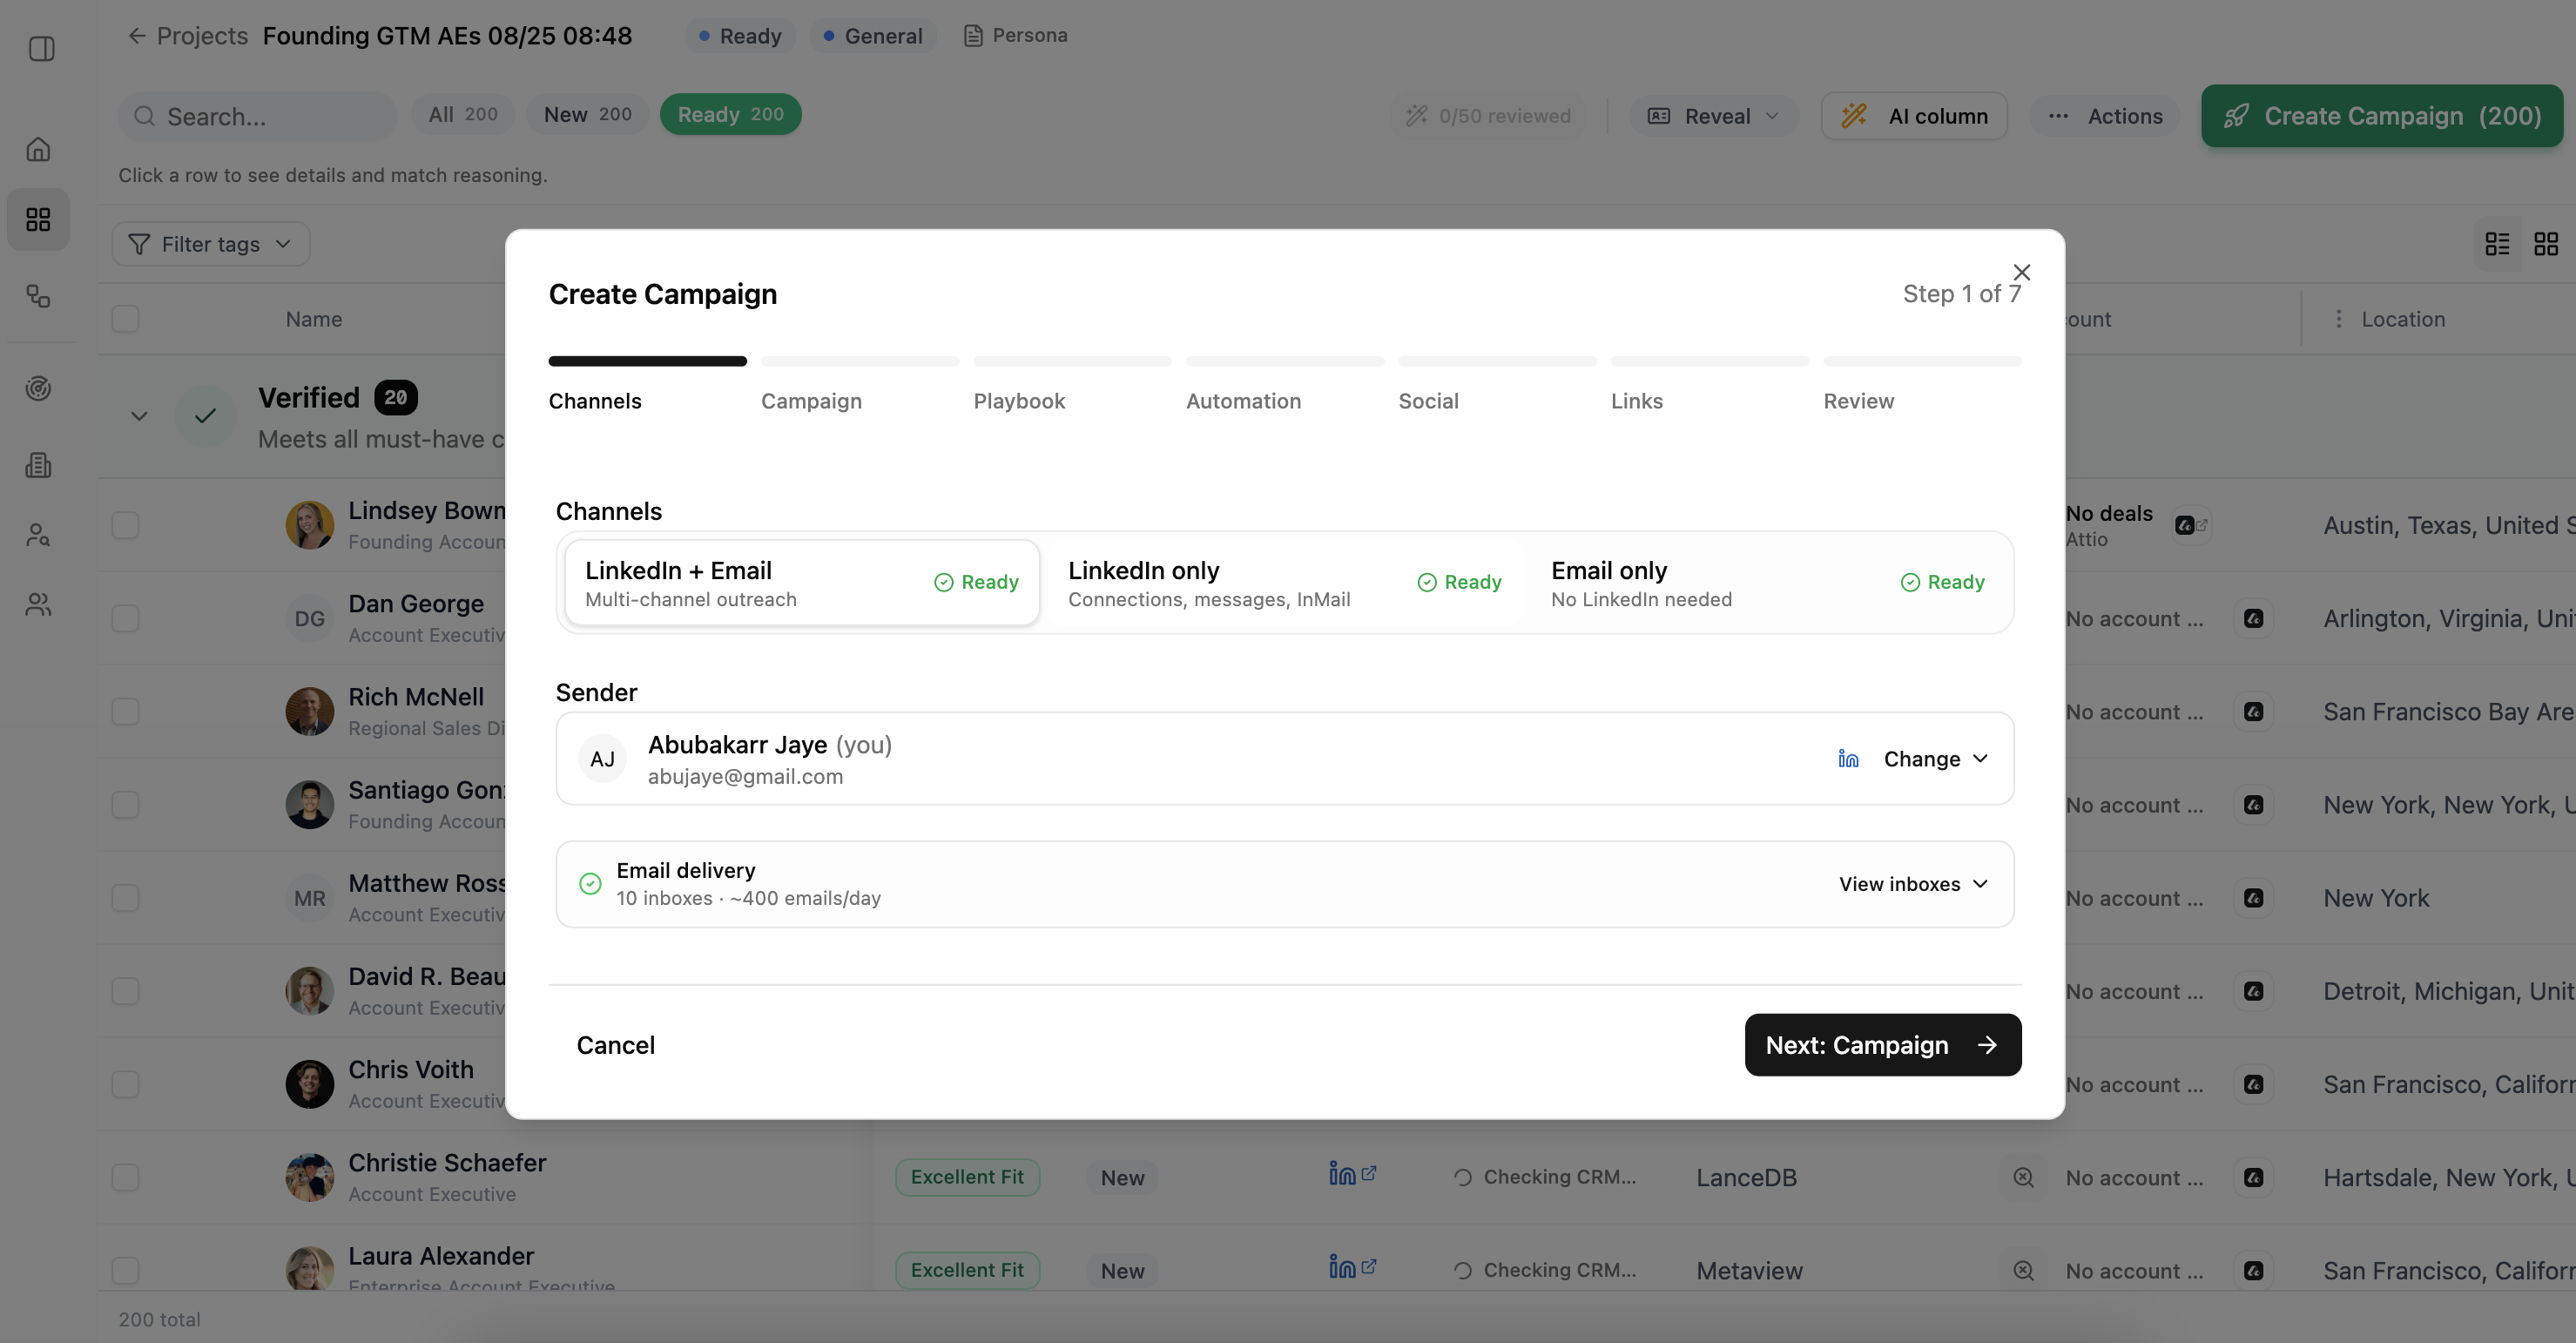
2. Choose a new or existing campaign
Choose New campaign to set a new goal, playbook, and approval rules. Choose Existing campaign to add the people without changing that campaign's current setup.
Only campaigns owned by the selected sender appear. You cannot add people to a completed campaign.
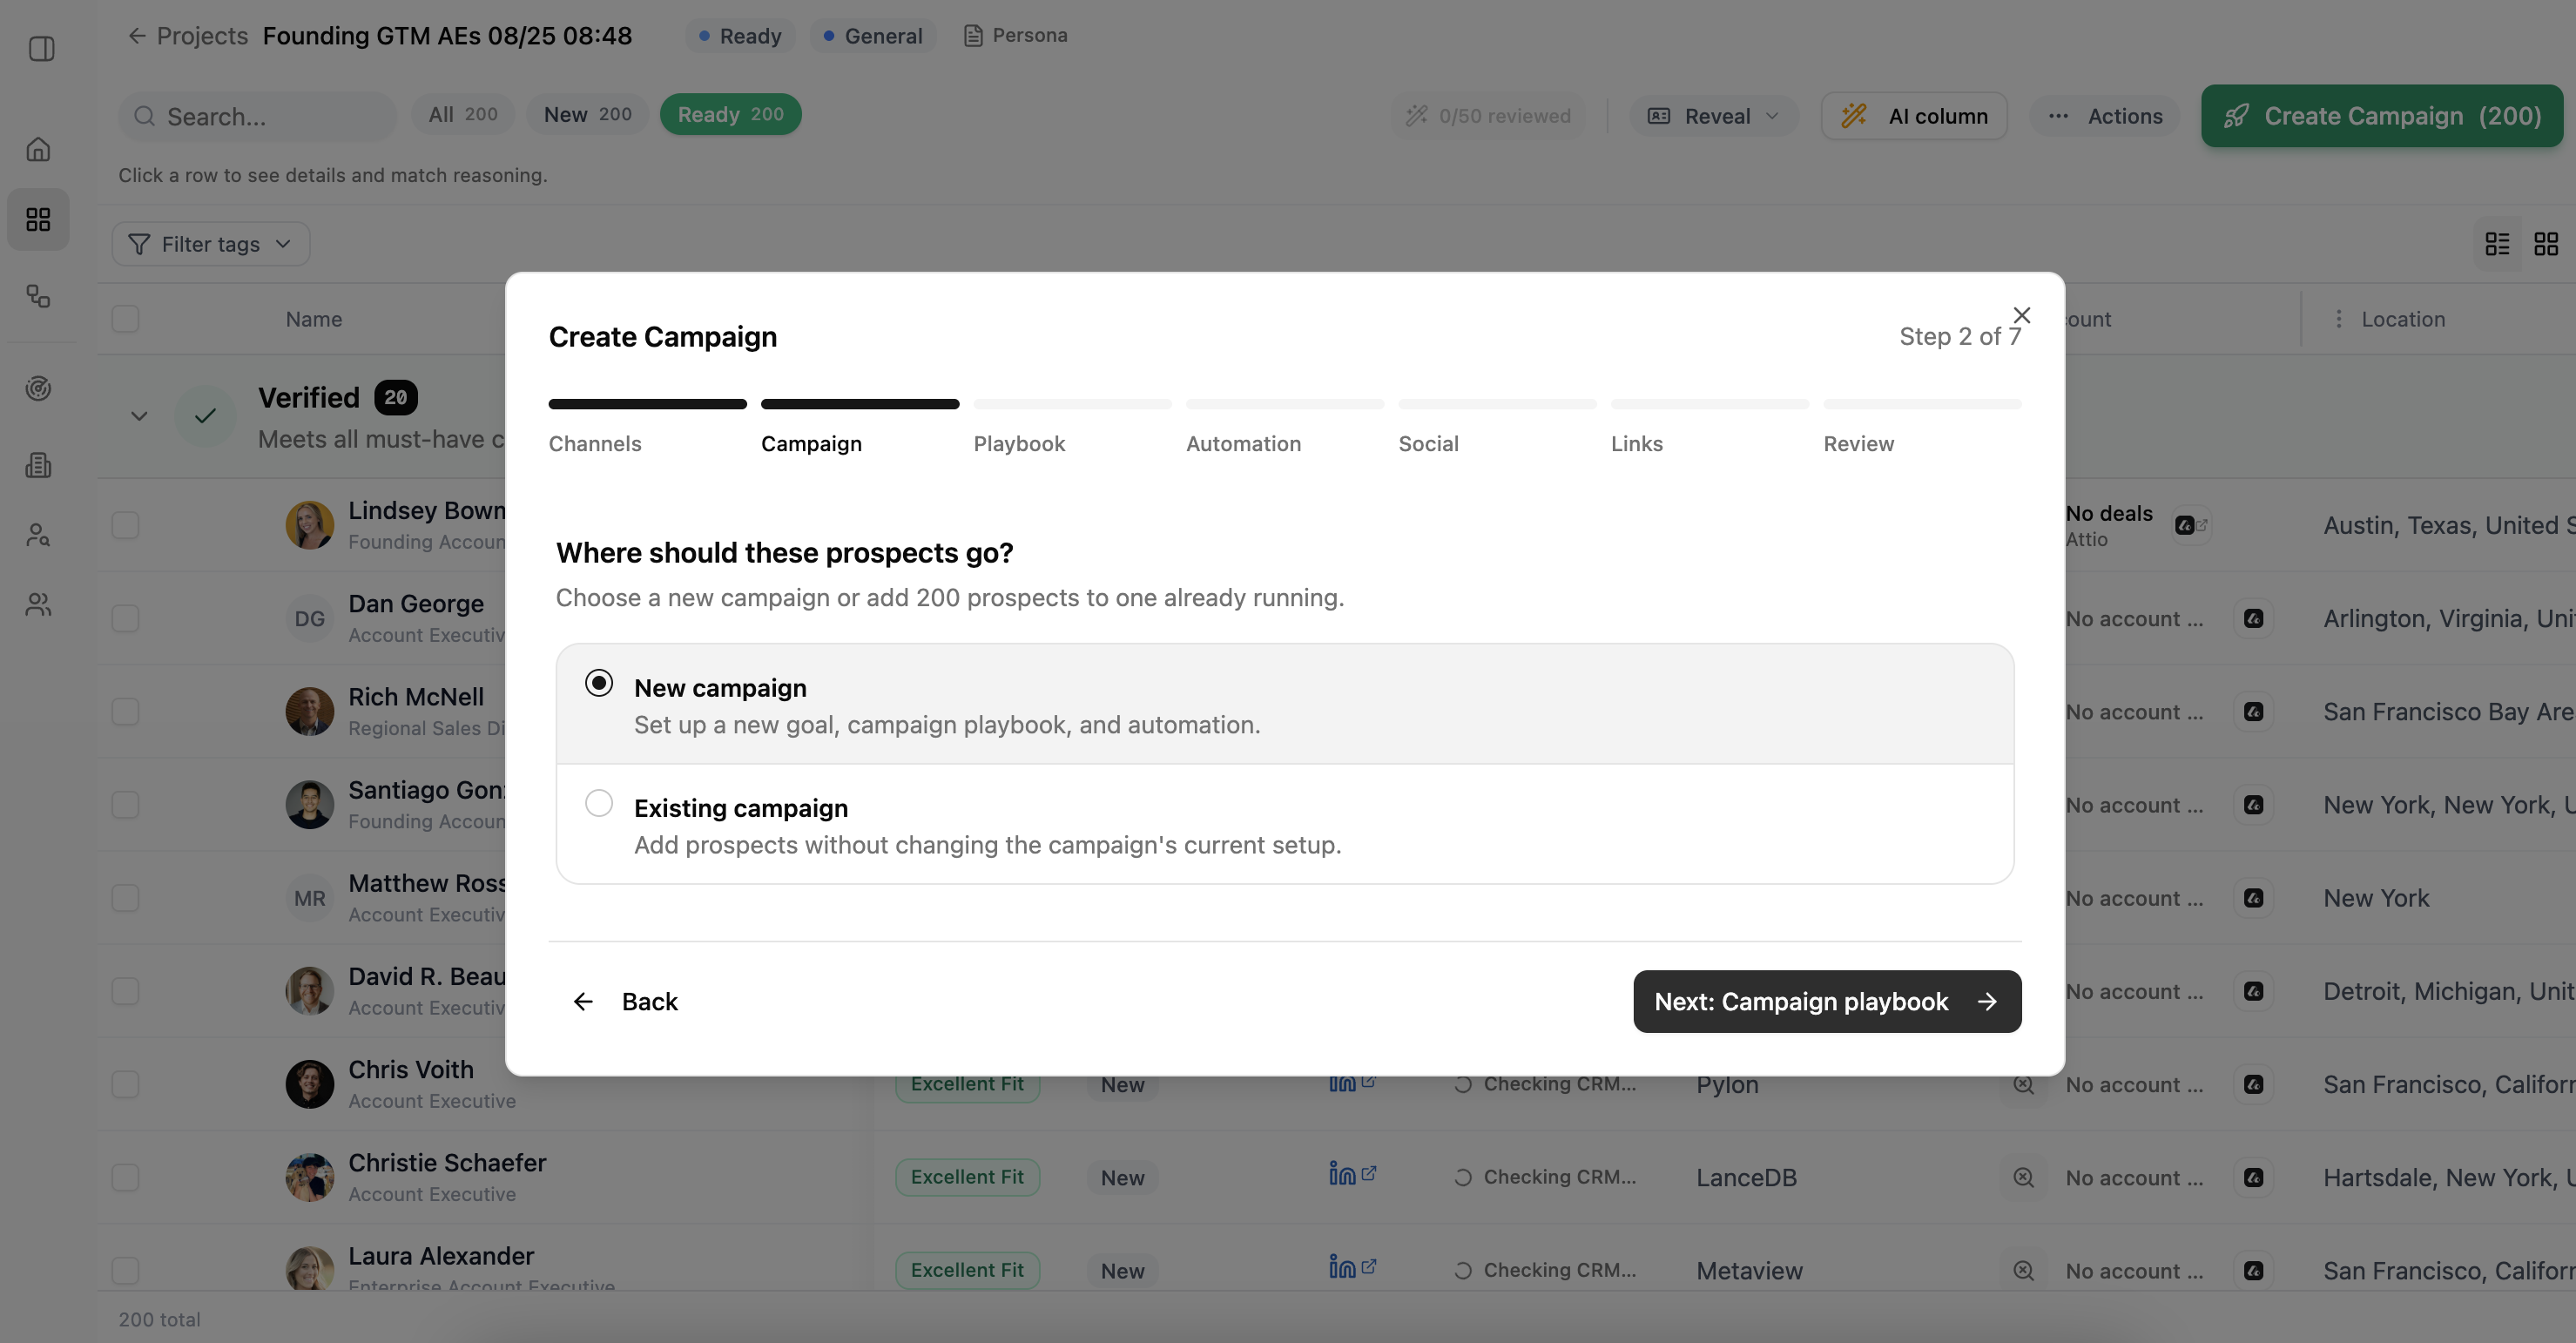
3. Build the campaign playbook
A playbook tells Lumnis how the campaign should communicate. It does not choose who to contact; the Project and Persona control the audience.
Choose Create new or Use saved. Give the playbook a clear name and state the outcome you want from the conversation.
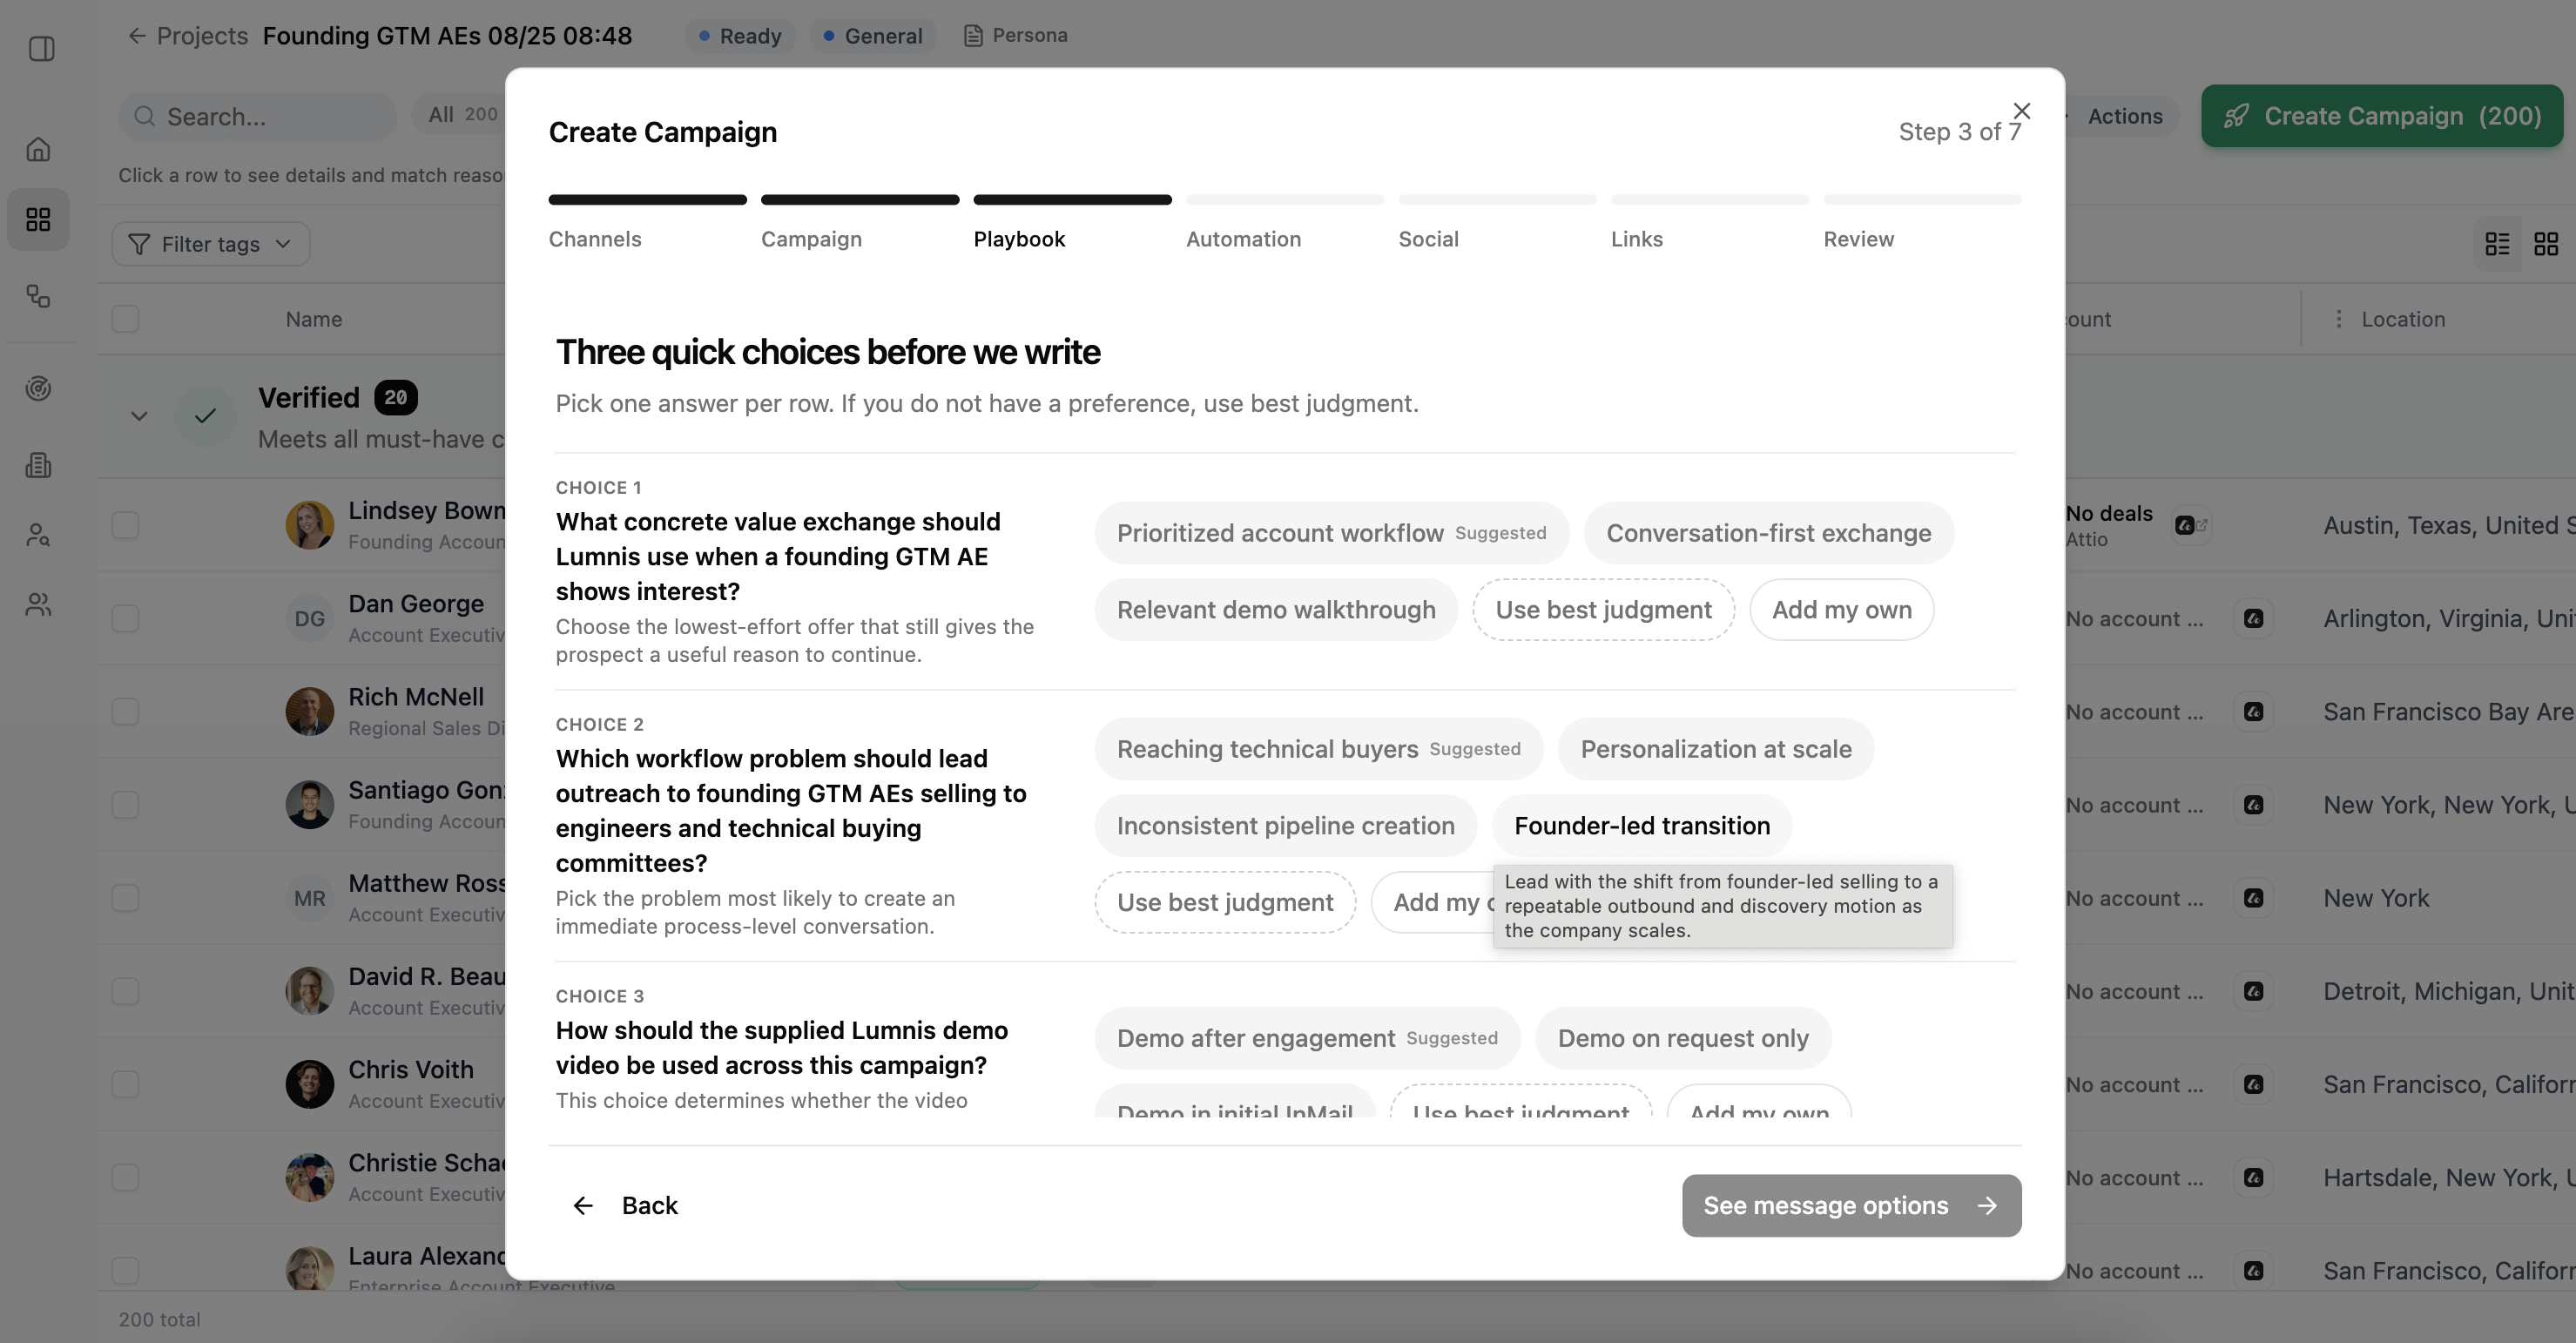
Answer the three short questions that follow. Choose a suggestion, add your own answer, or use Use best judgment when you do not have a preference.
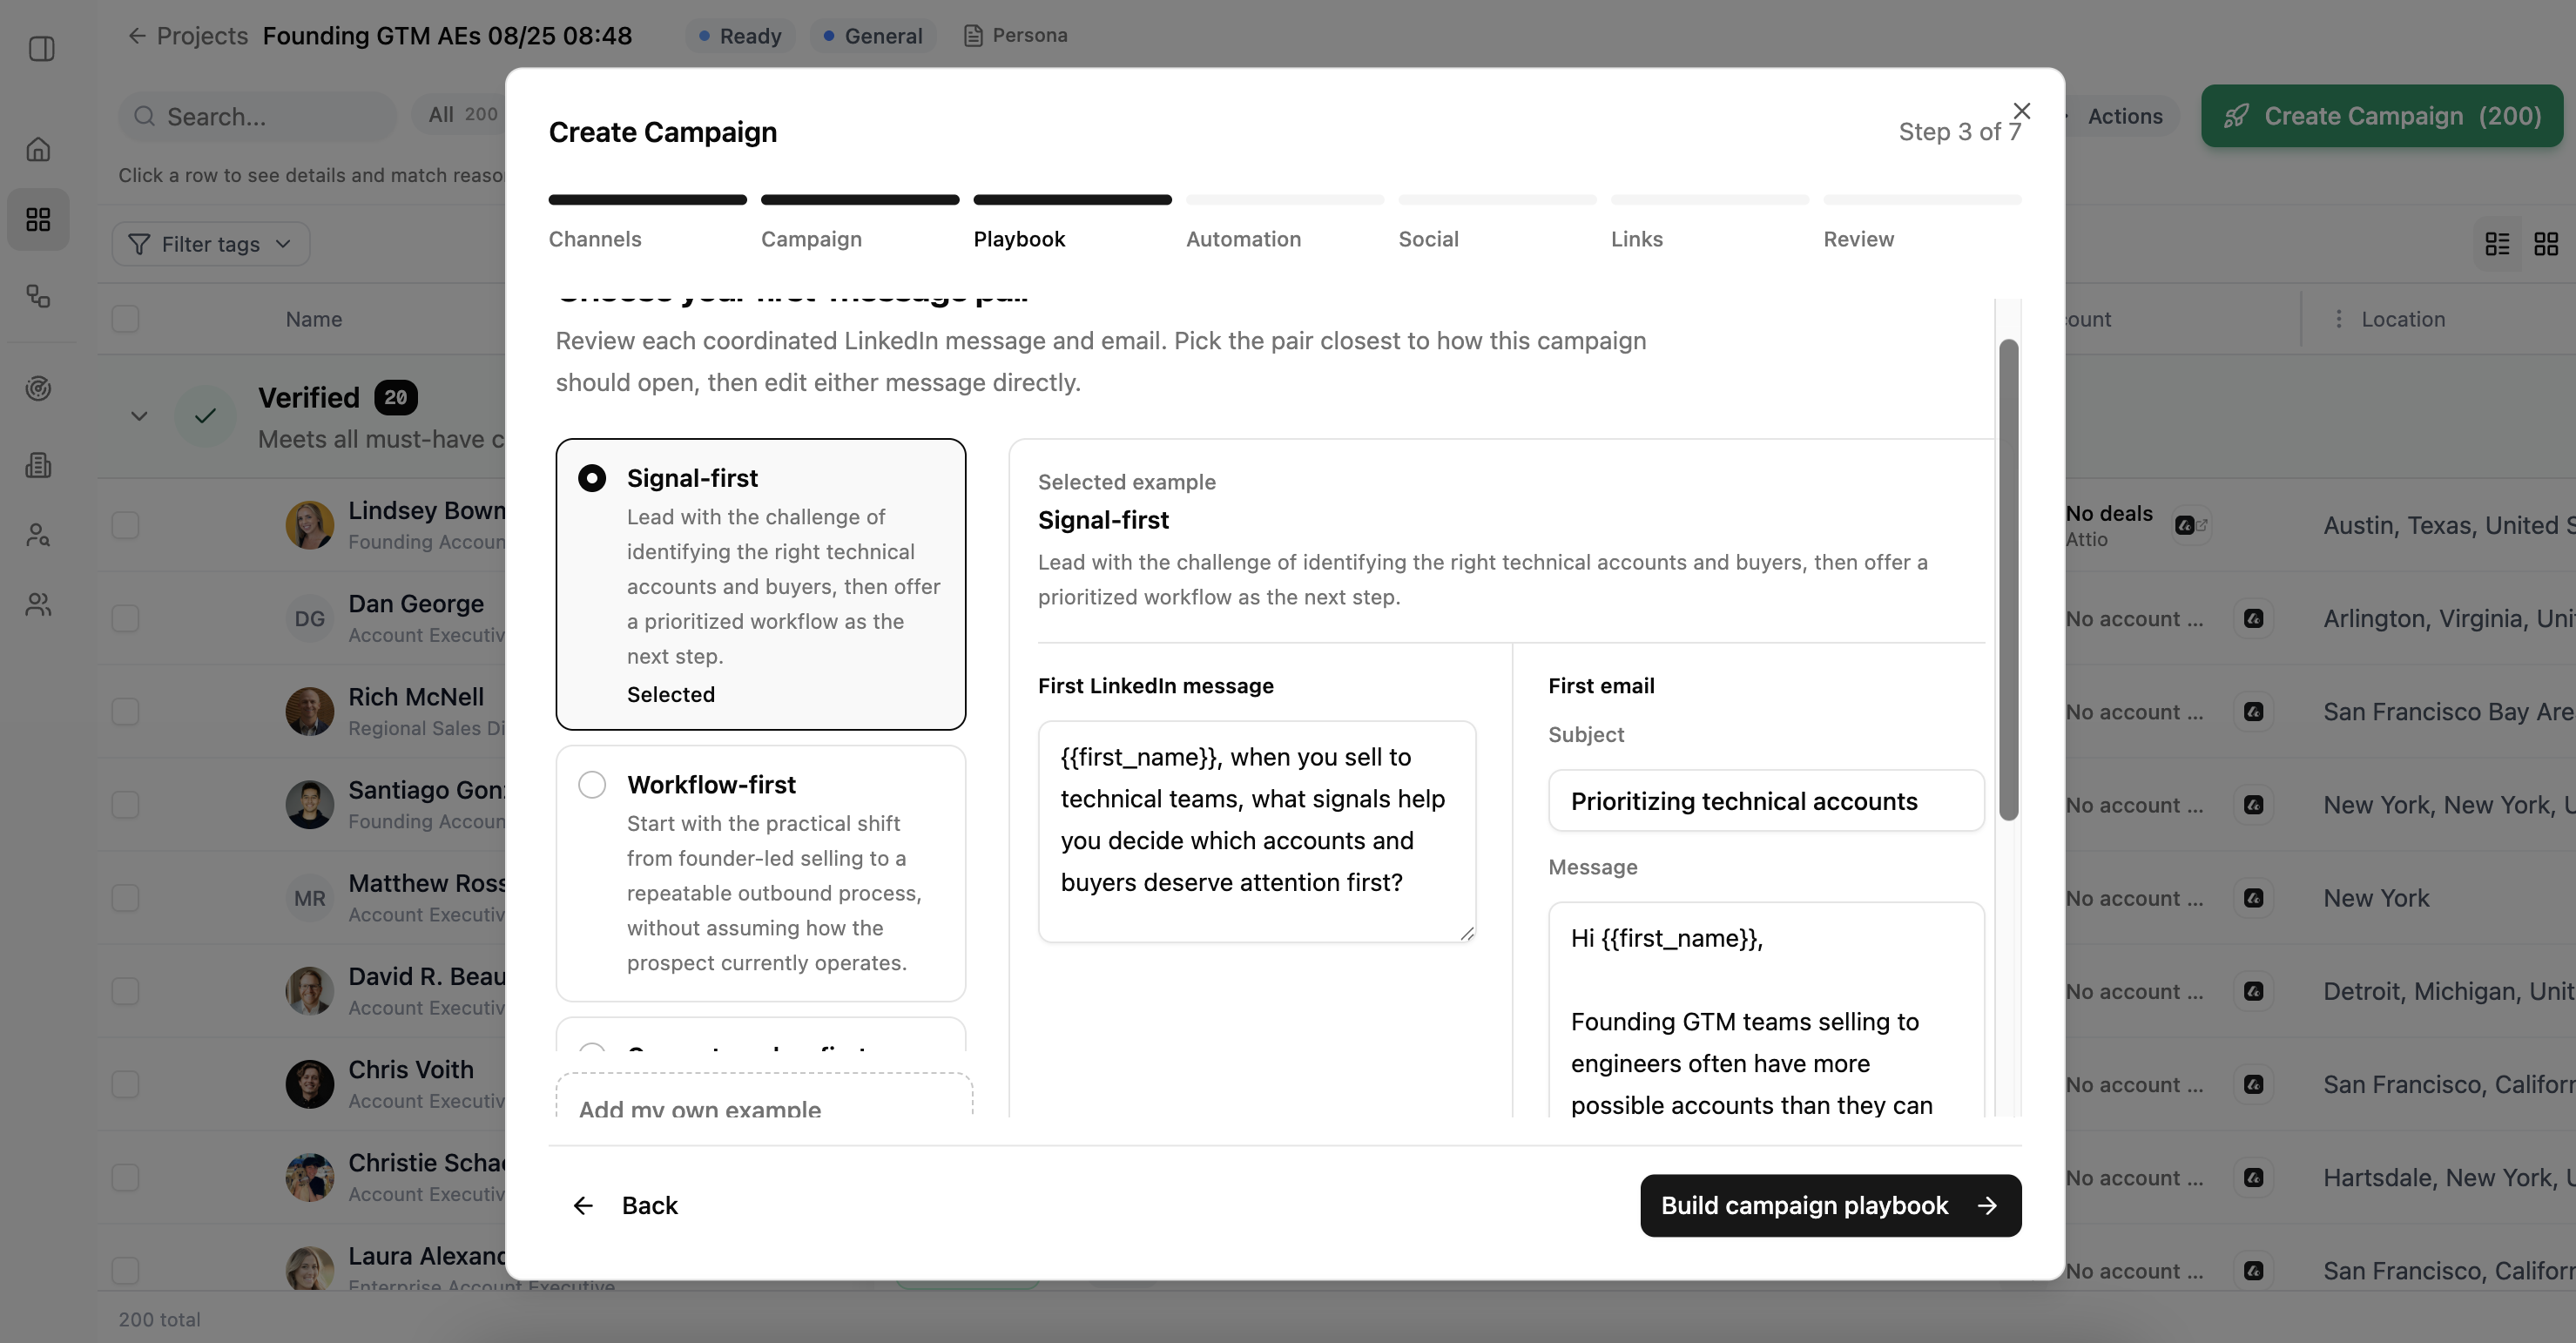
Next, choose the message pair closest to the opening you want. Review and edit both the LinkedIn message and email before building the full playbook.
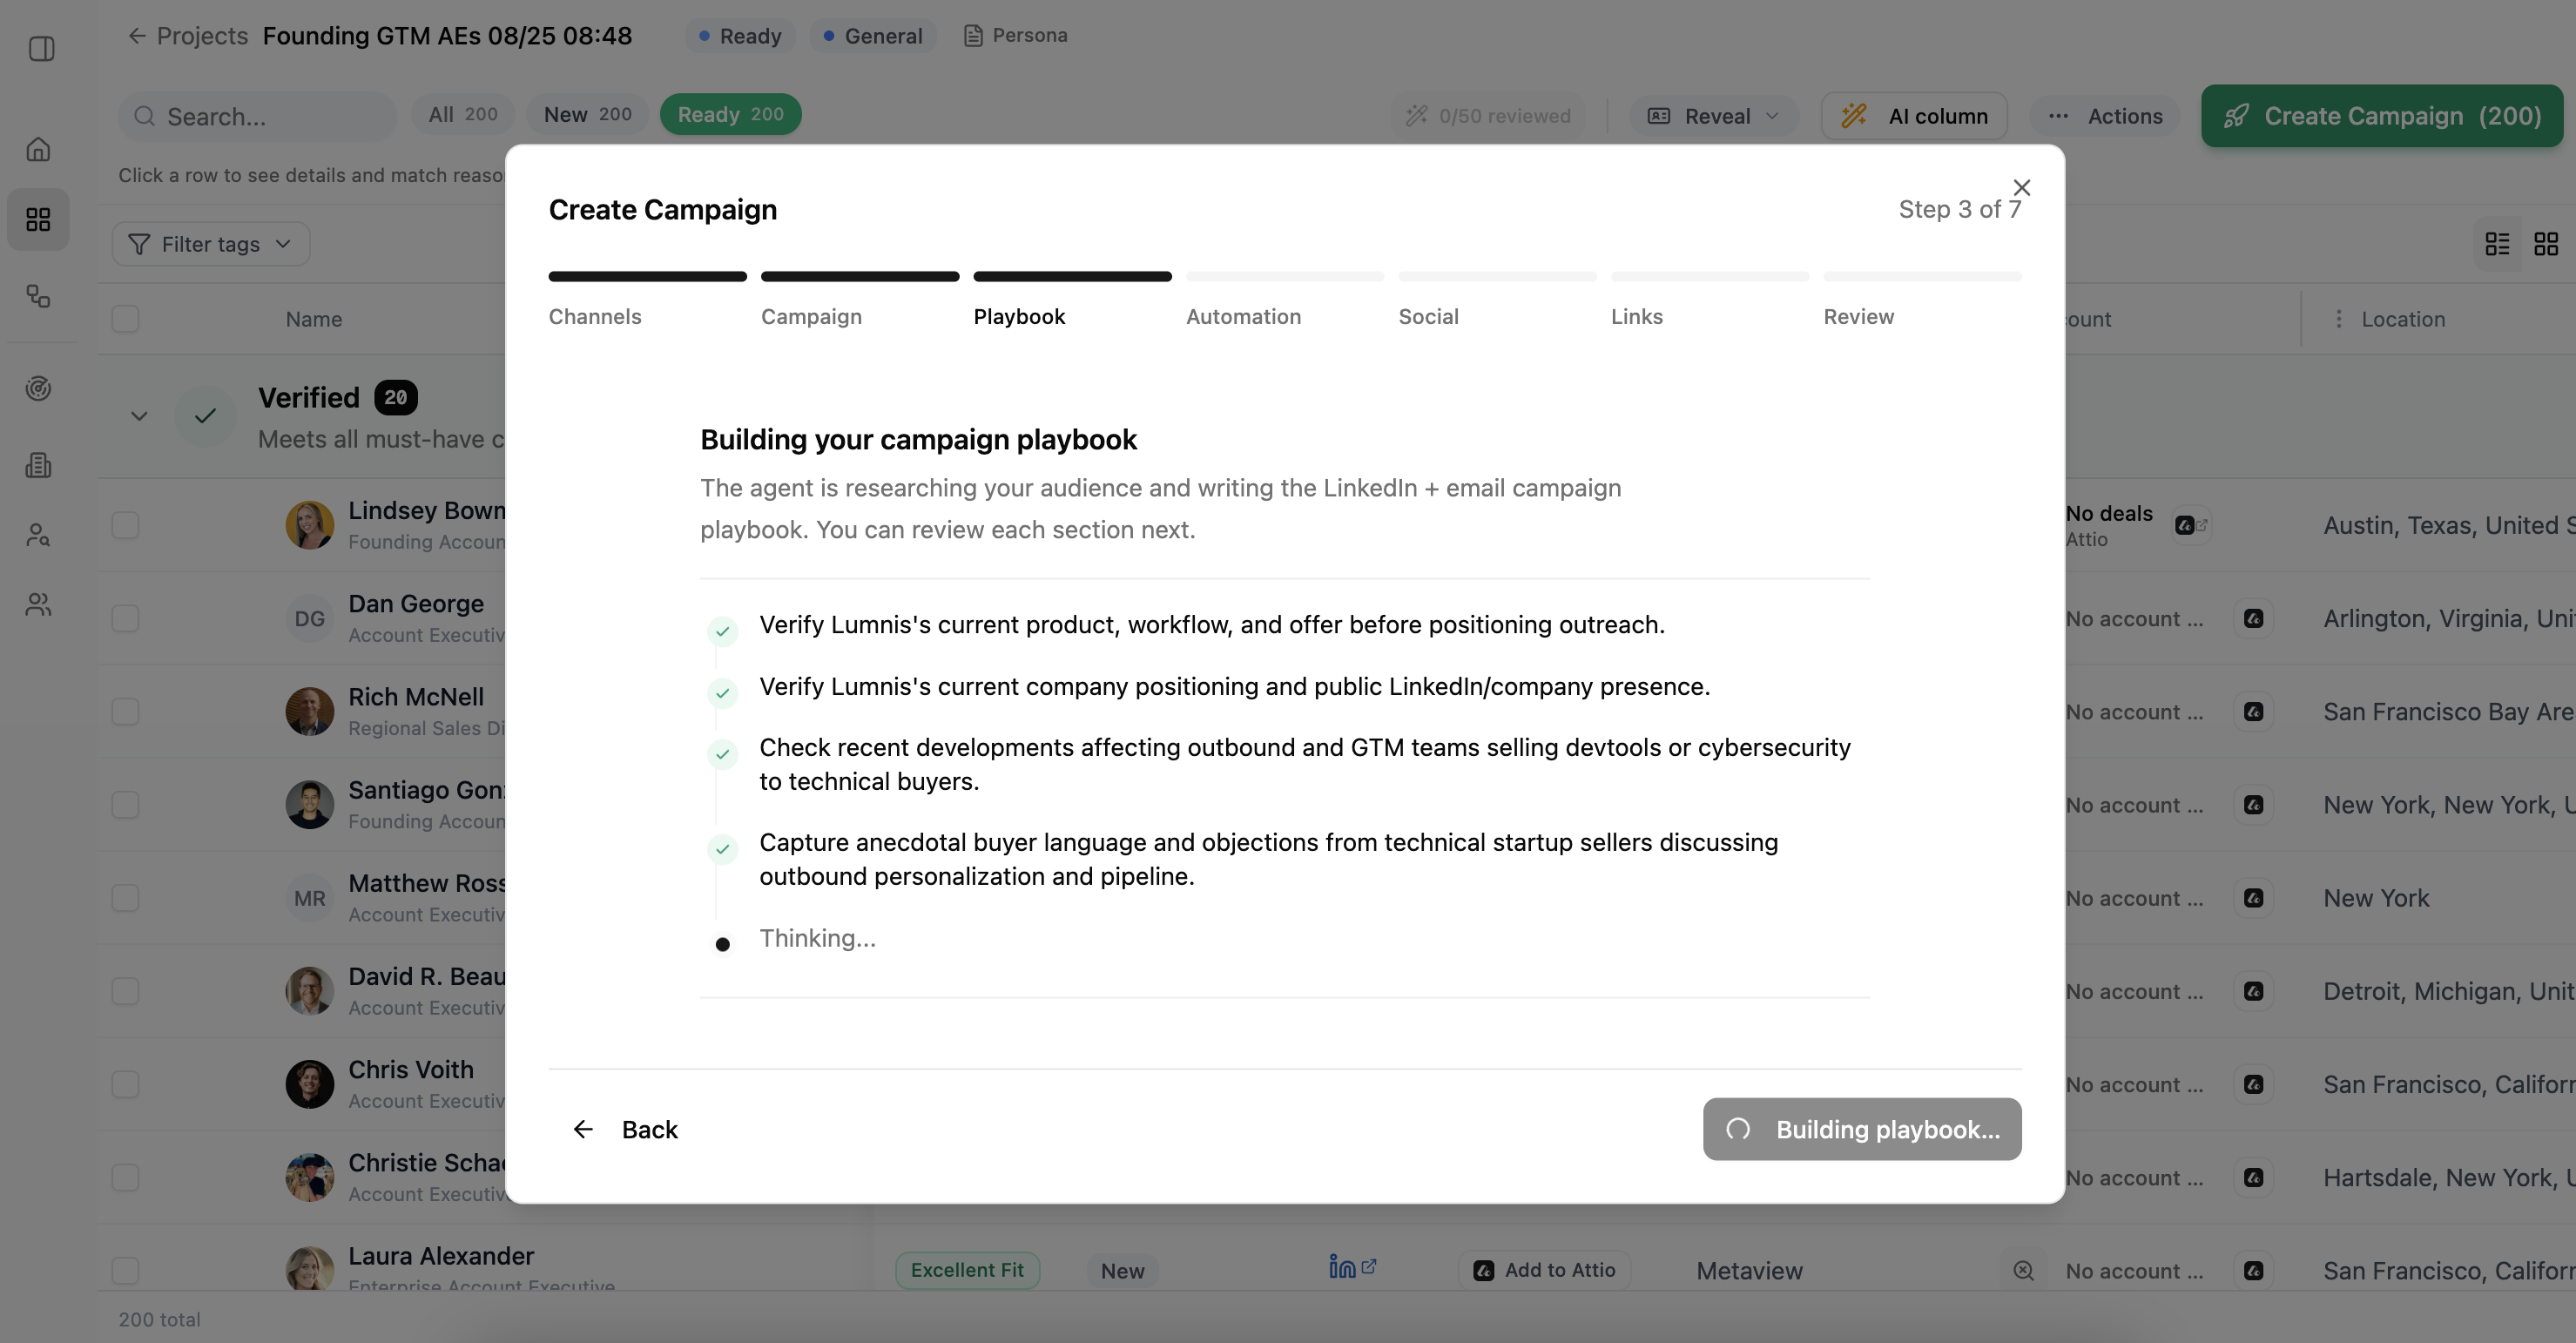
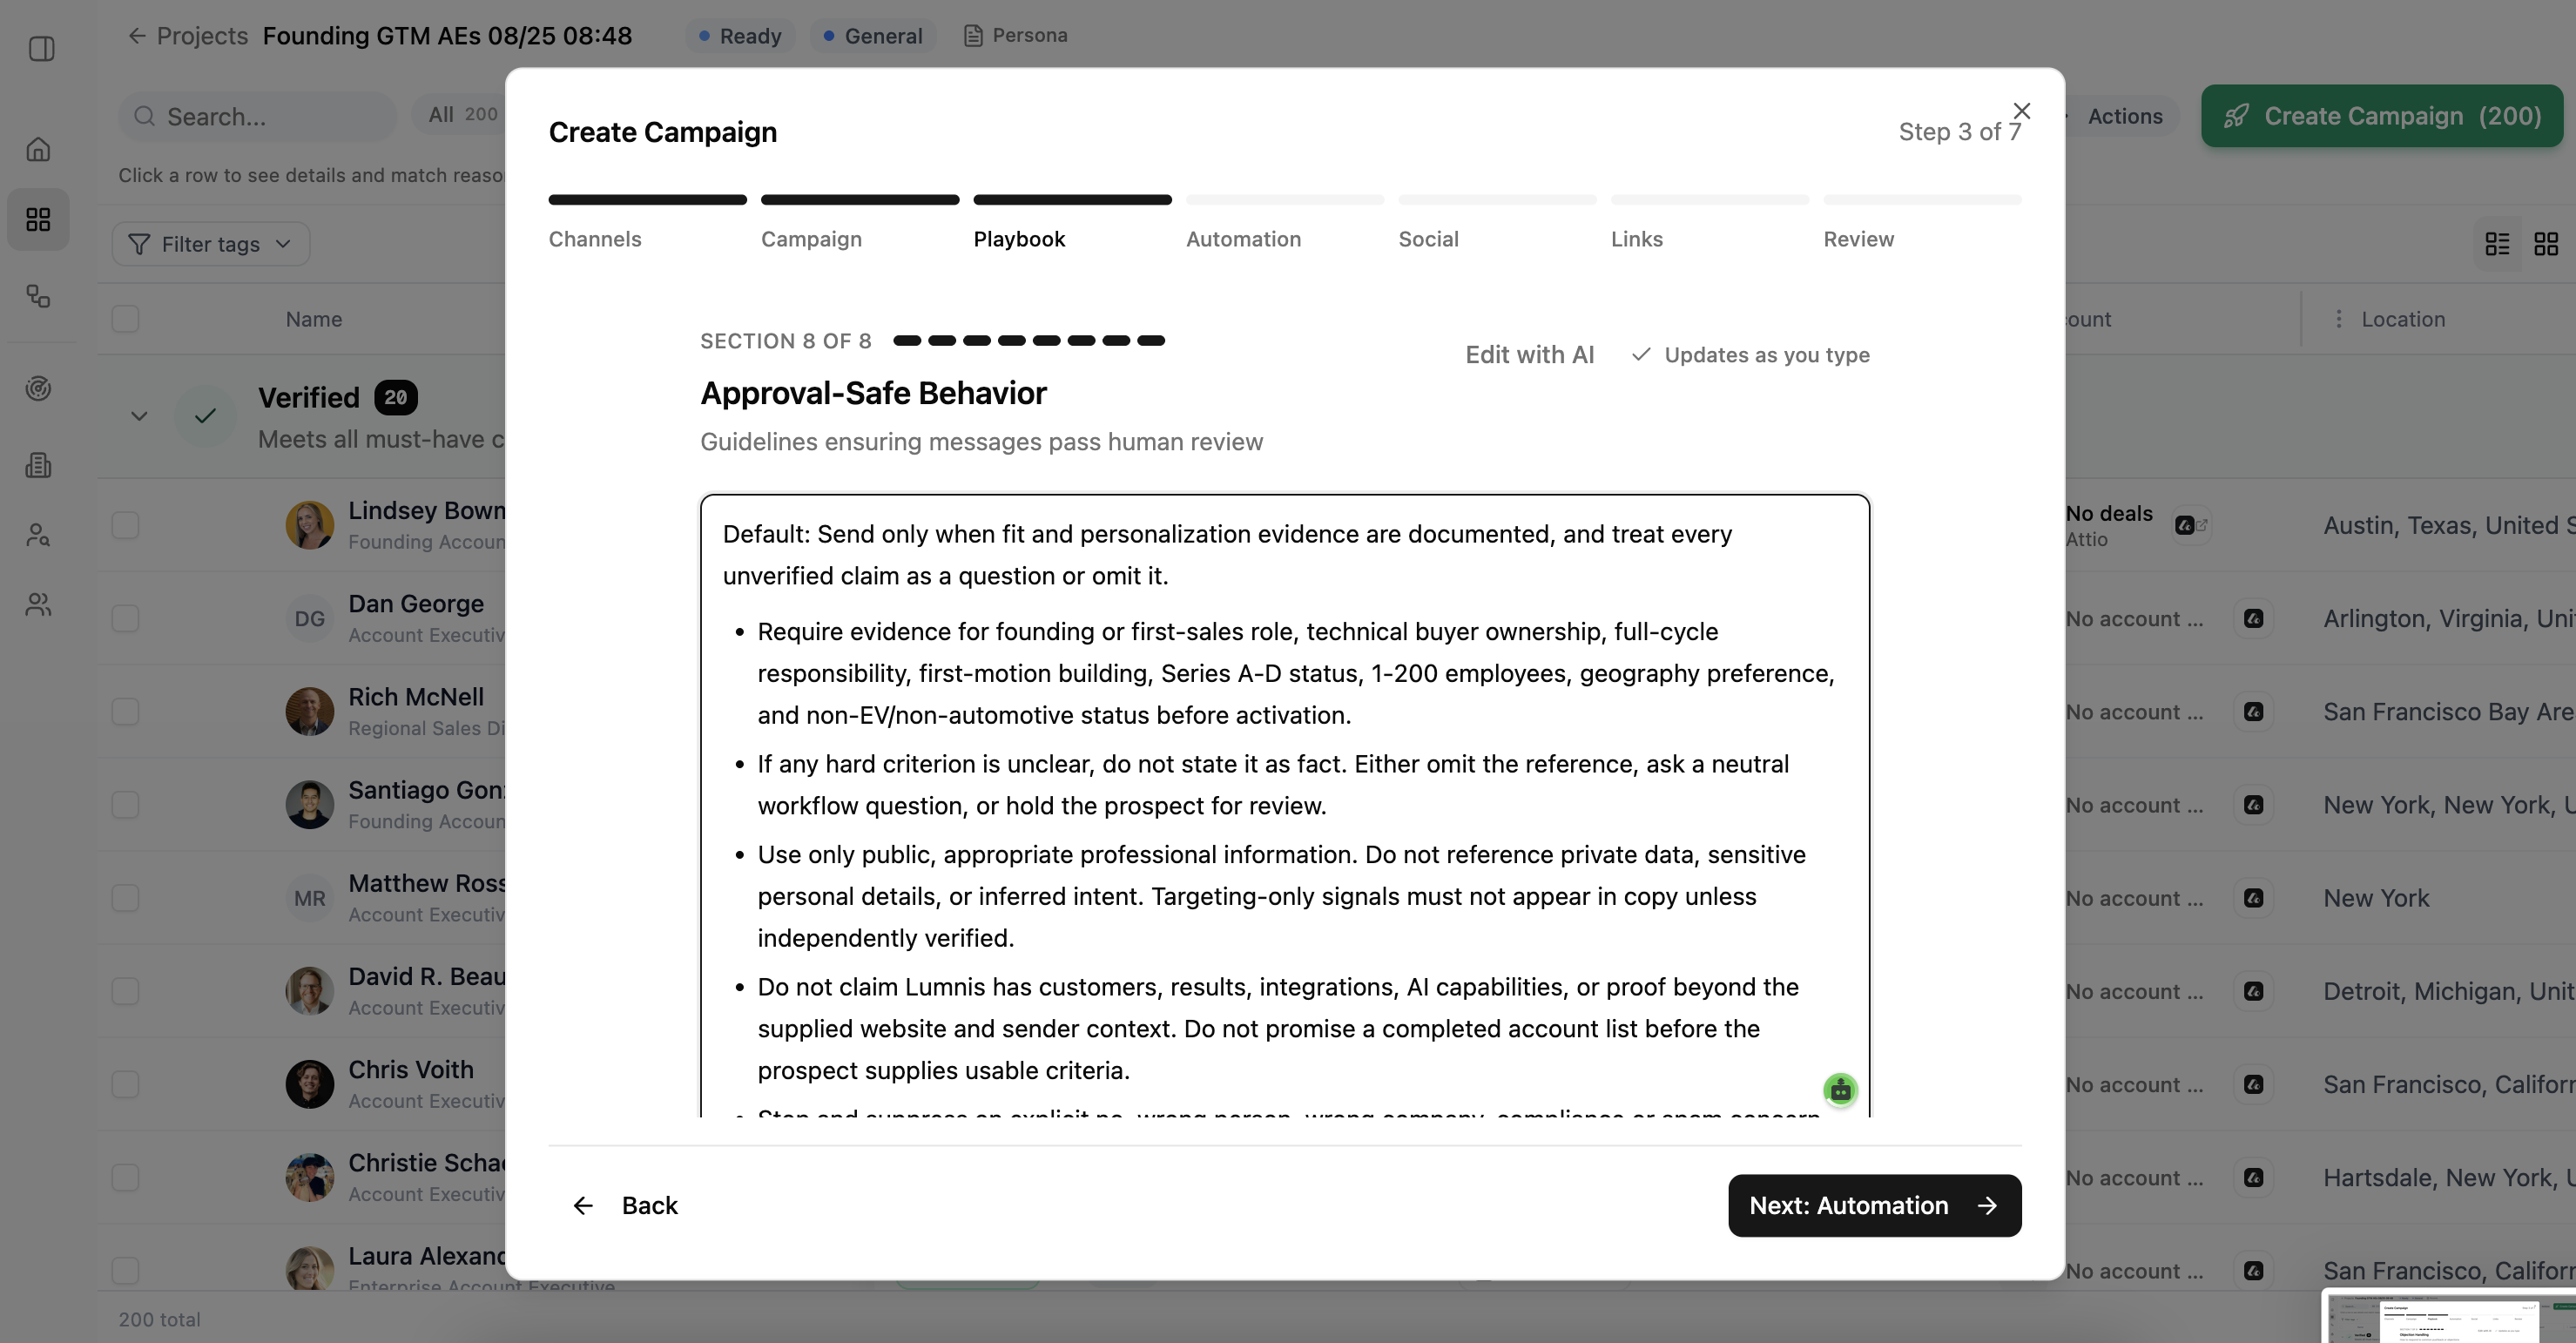
Lumnis researches the audience and prepares the playbook. When it is ready, review these eight sections:
- Sequencing
- Message tone and personalization
- Positioning
- Do and don't rules
- Call to action
- Follow-up logic
- Objection handling
- Approval-safe behavior
Edit any section directly or choose Edit with AI. Check that the claims, examples, timing, and stop rules match how you want the campaign to run.
Change the Persona or prospect list when the audience is wrong. Change the playbook when the message approach is wrong.
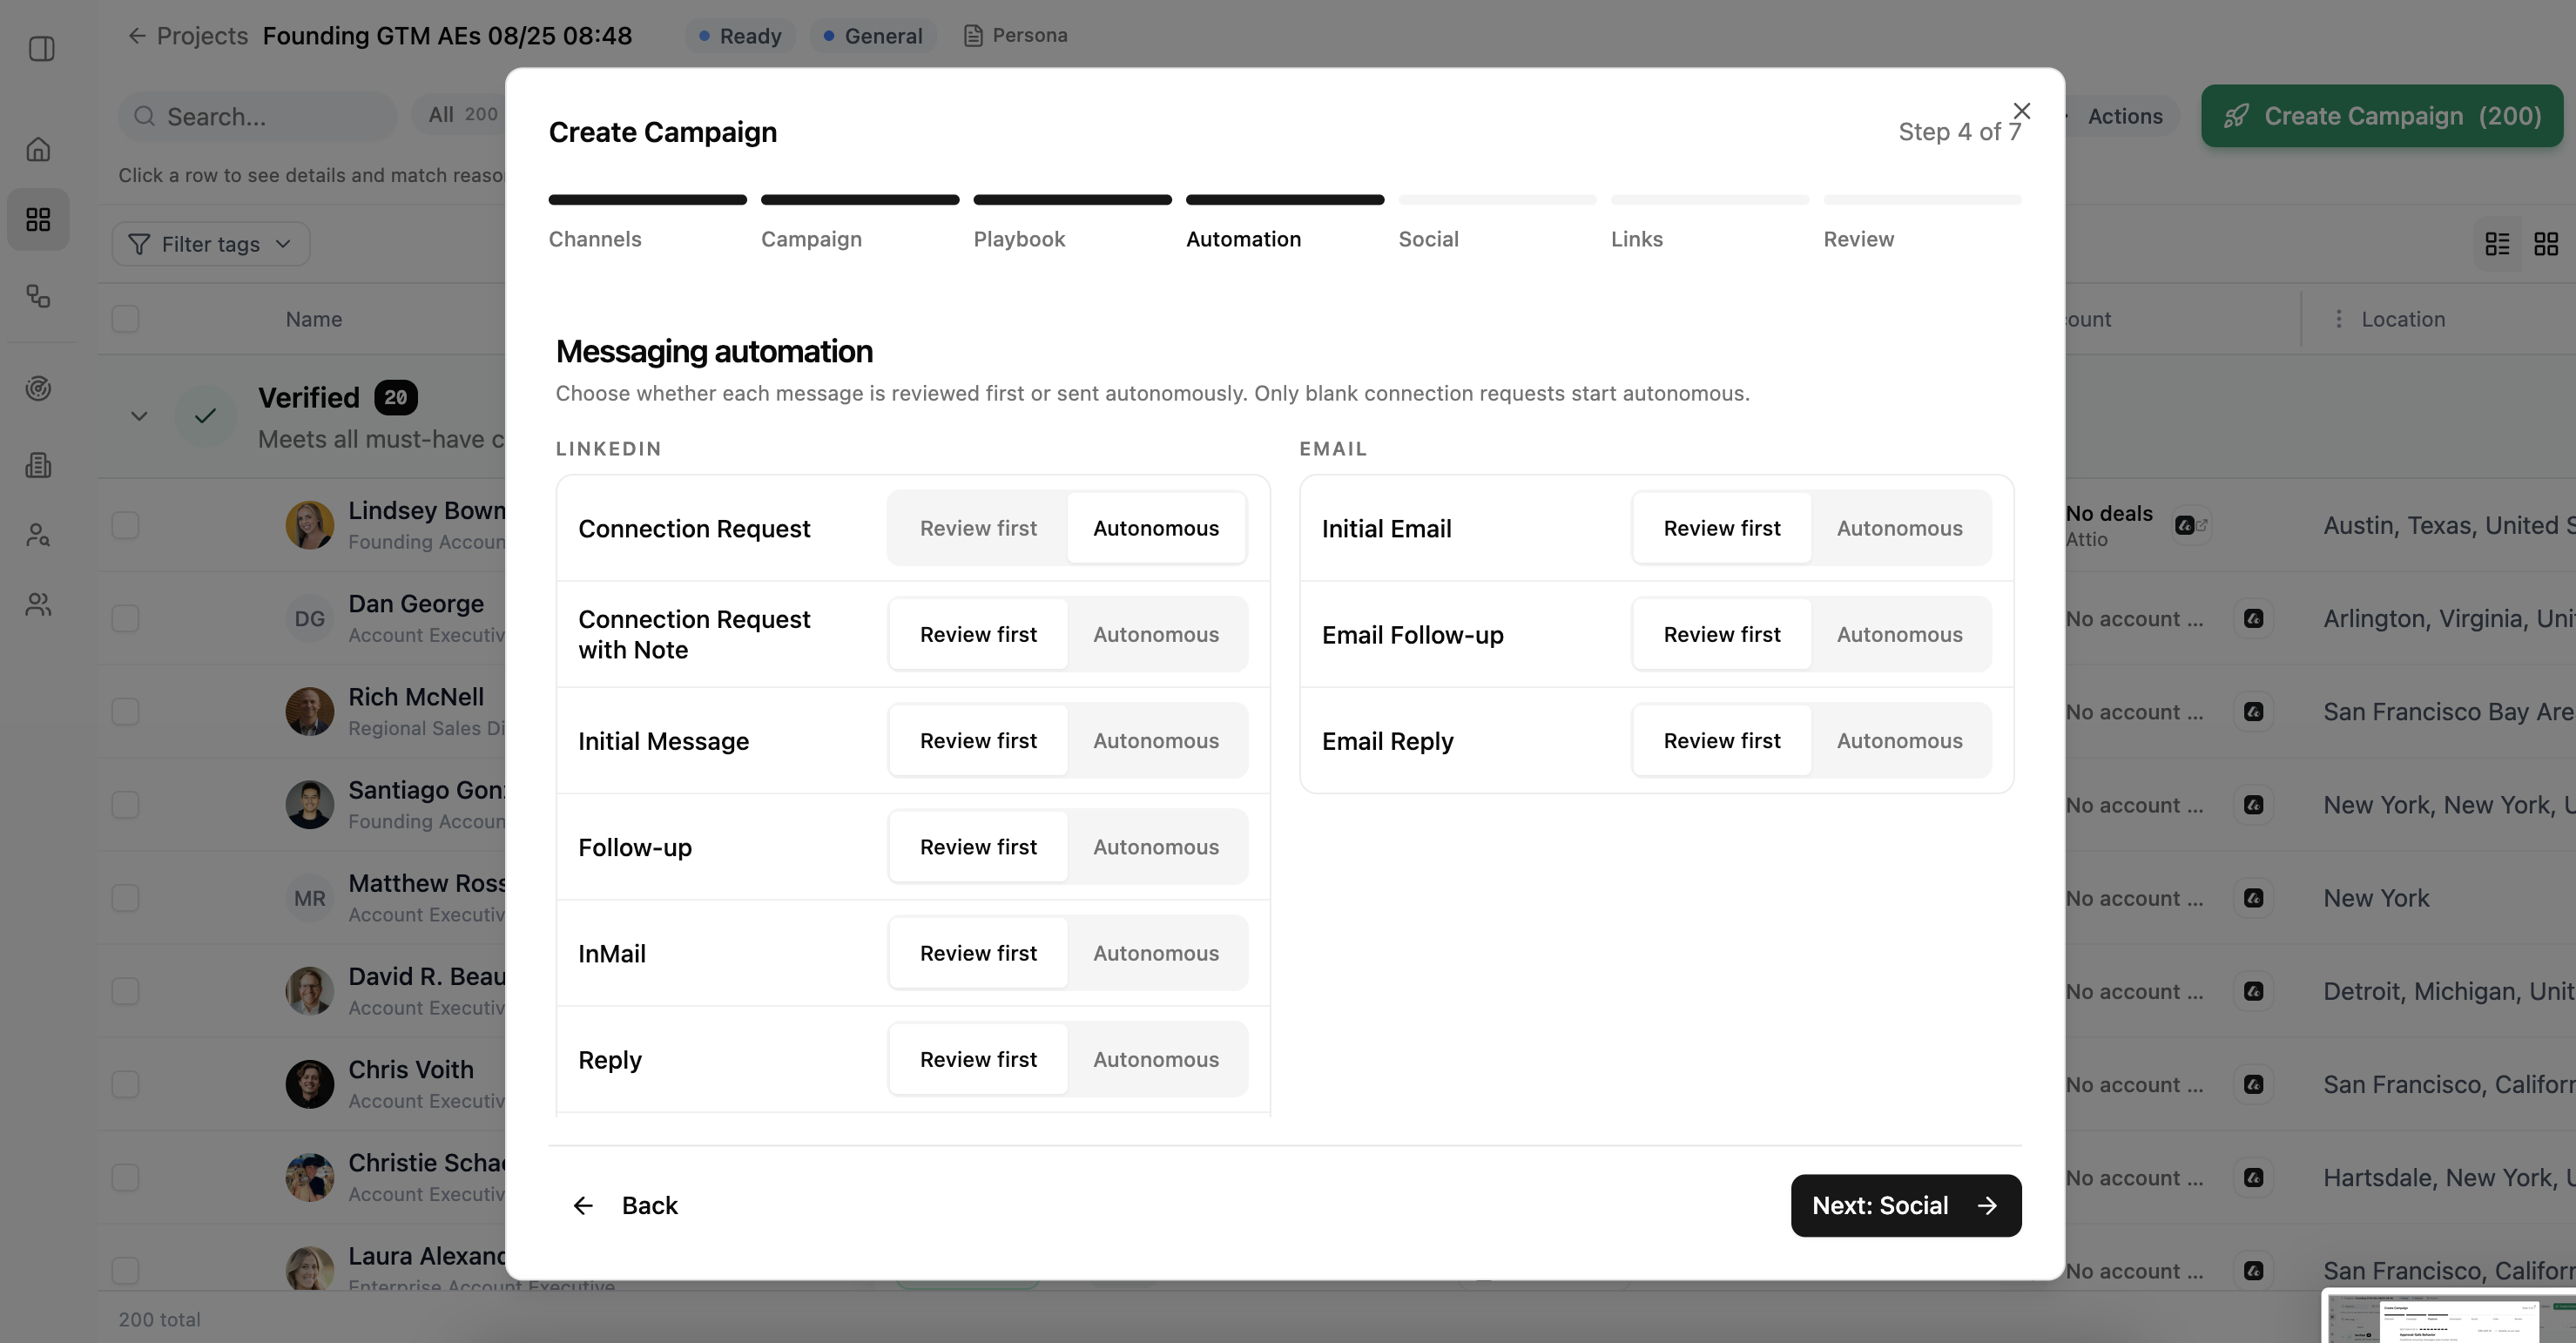
4. Choose what needs approval
For each LinkedIn and email action, choose Review first or Autonomous. Review-first actions wait for approval. Autonomous actions can continue without approval when the sending account is ready.
Start with Review first when you are still checking the campaign's tone or rules. Only blank connection requests start as autonomous by default.
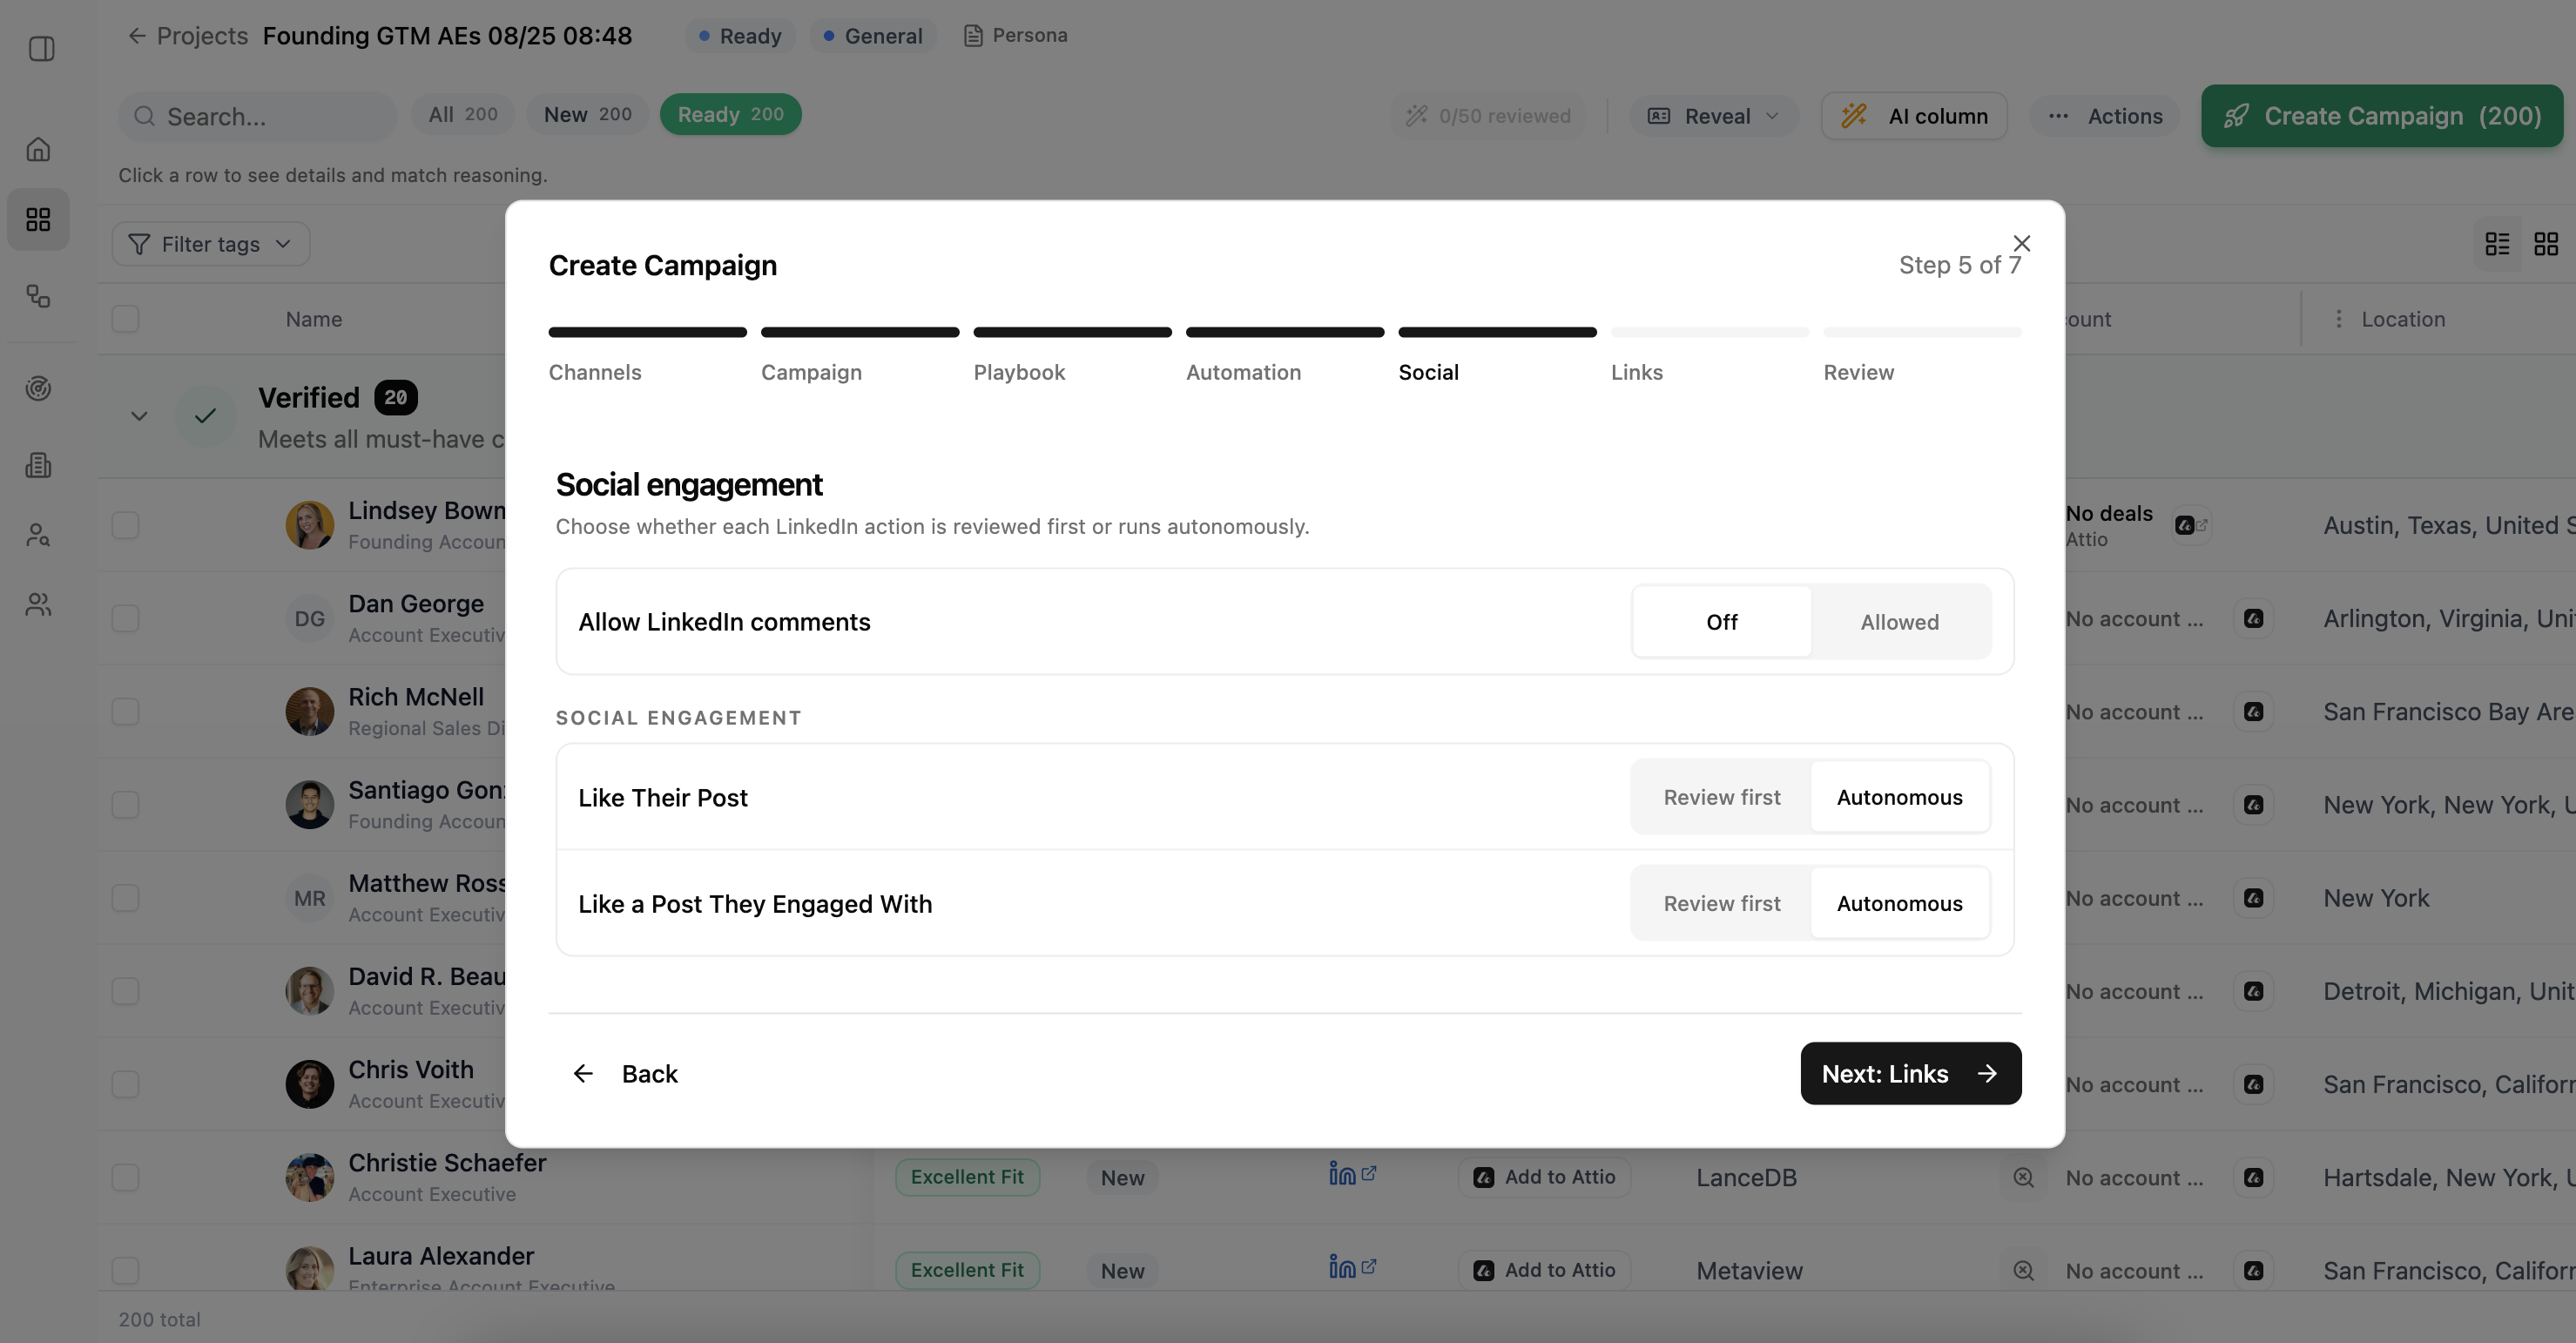
5. Choose social engagement settings
Decide whether the campaign may comment on LinkedIn posts. Then choose whether each allowed social action should be reviewed first or run automatically.
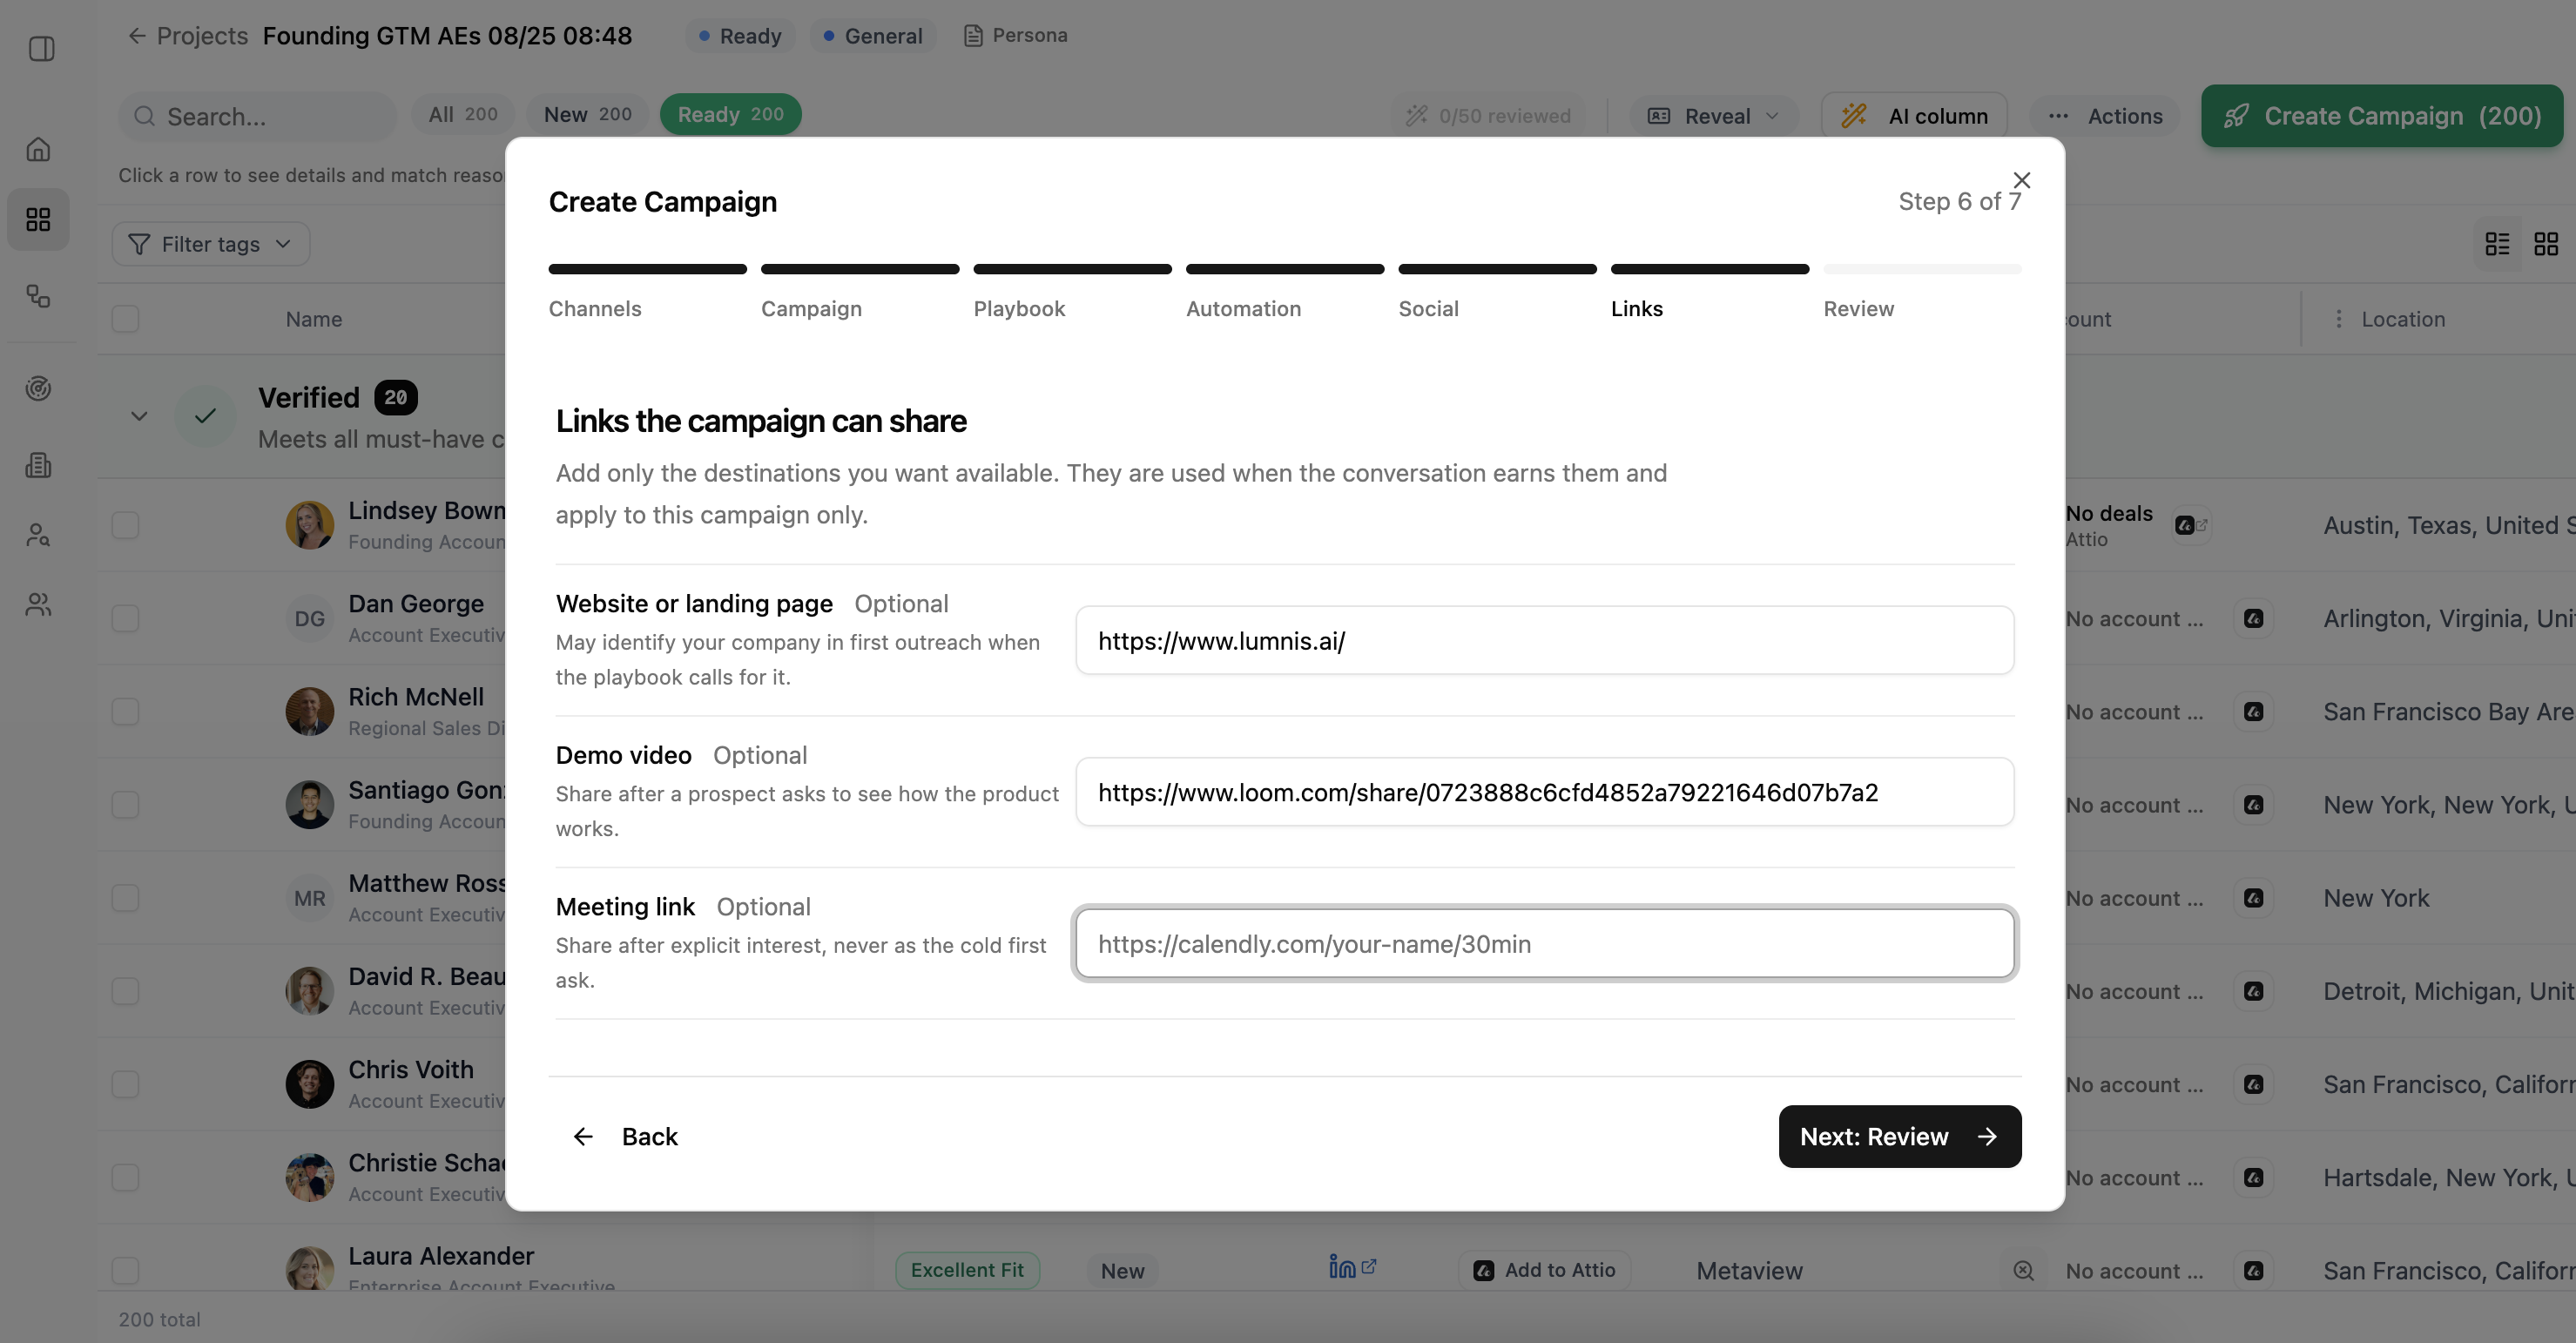
6. Add links the campaign can share
Add a website, demo video, or meeting link only when the campaign may need it. These links are available to the campaign; they are not added to every message.
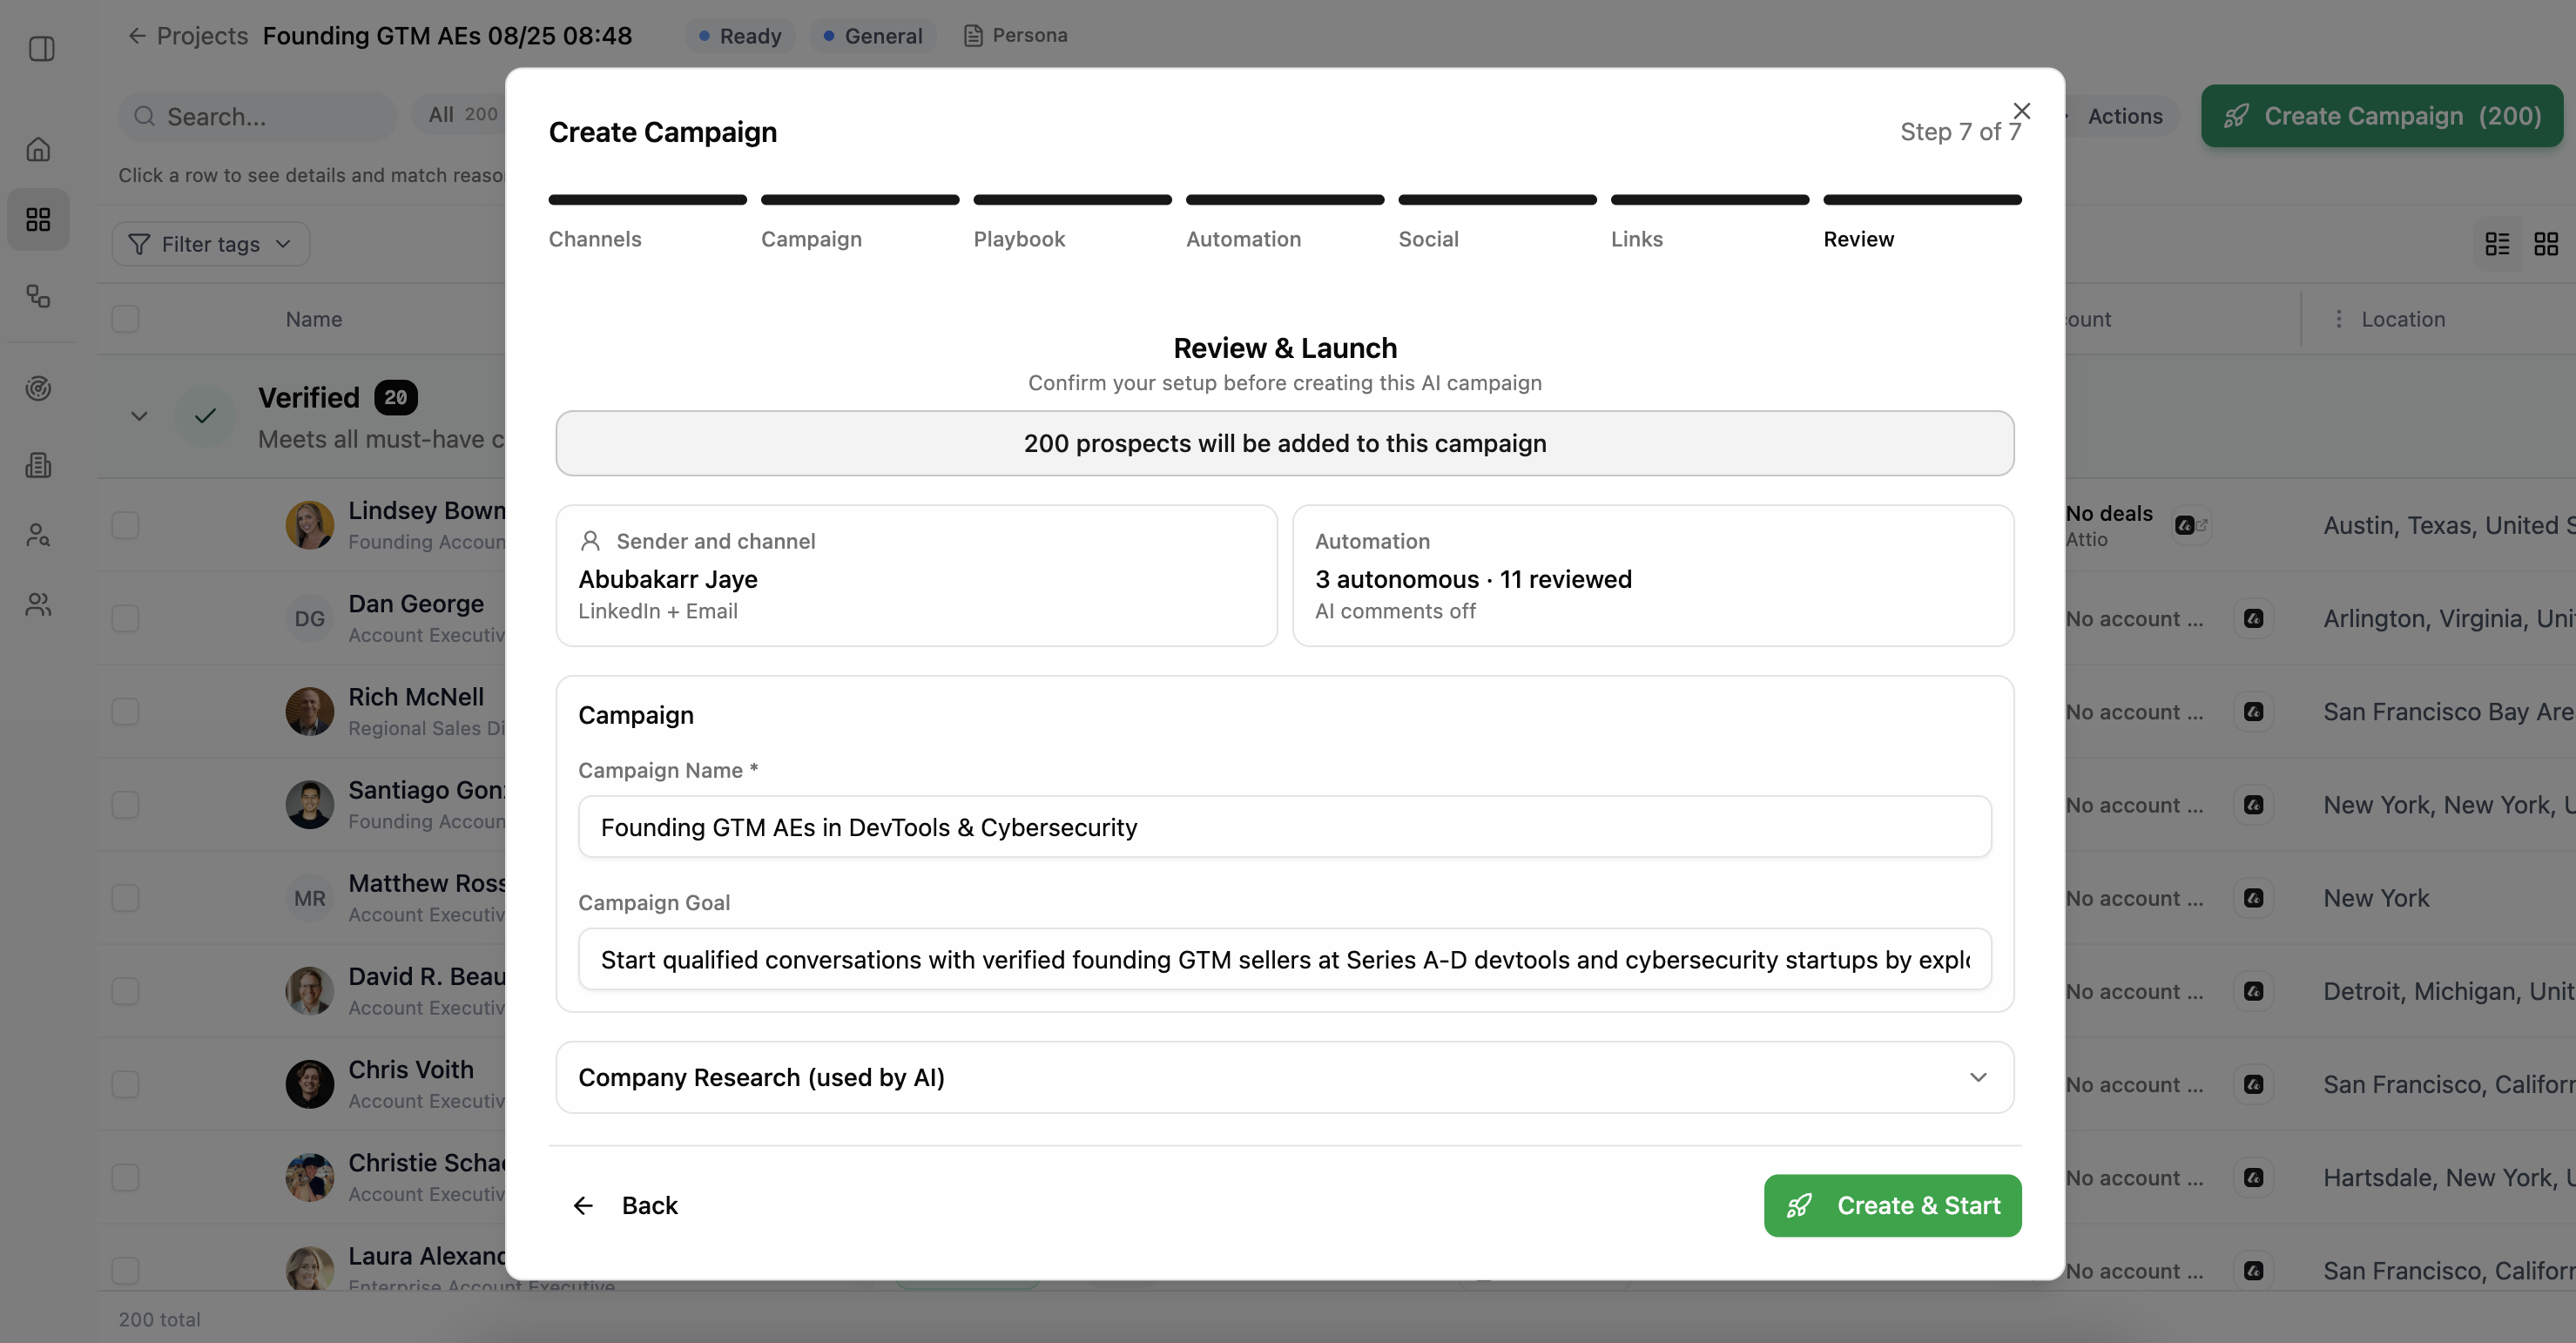
7. Review and launch
Confirm the number of people, sender, channels, approval settings, campaign name, goal, and company research. Go back and correct anything that does not match your plan.
Choose Create & Start when the setup is ready.
After launch
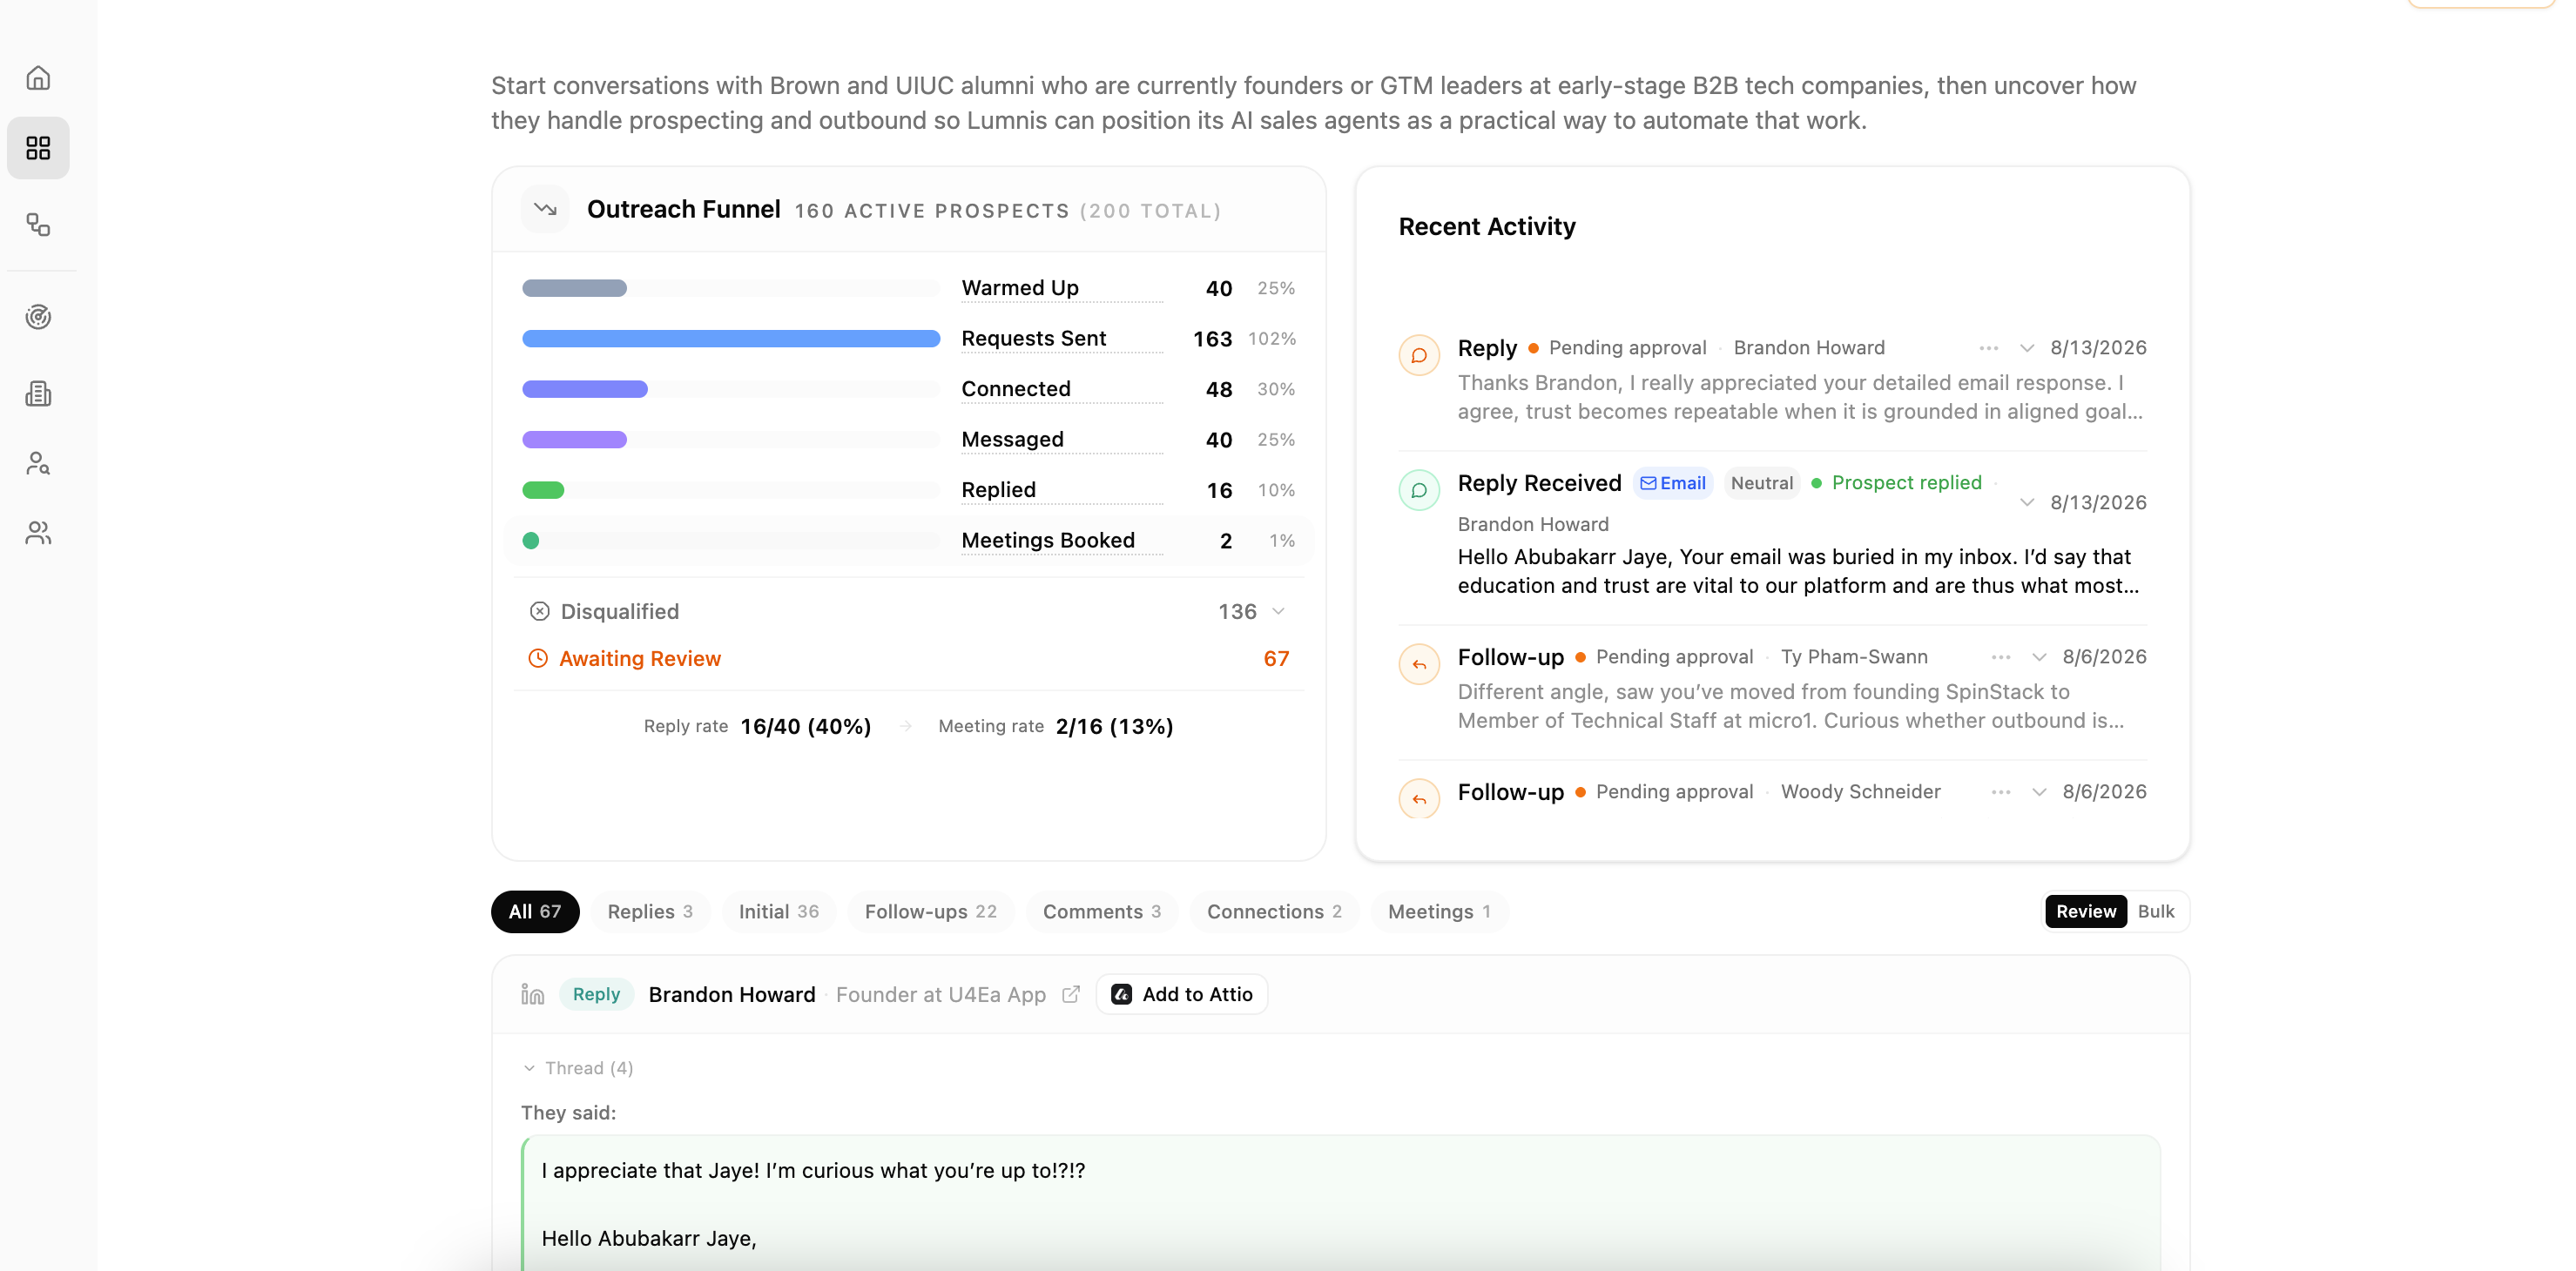
Open the campaign from its Project to see outreach progress, recent activity, replies, and actions waiting for review. Use Playbook to review the campaign instructions. Pause the campaign when the audience, sending account, or playbook needs correction.
Use Pipelines and Approvals when you want a search and campaign process to repeat each week. Use Integrations when a sending account needs attention.
If you cannot continue
- A channel says Needs setup — connect the required LinkedIn account or email inbox, or choose another channel.
- No people are ready — return to the Project and finish reviewing the results.
- No existing campaigns appear — create a new campaign or confirm the selected sender.
- Create & Start is unavailable — check that the campaign name, outcome, and playbook are complete.